I really wanted to love the Vego kitchen composter.
I currently live in an apartment without a patio or balcony, which means I have no way of composting on my own.
I was paying a monthly fee for a community composting service where I dropped off my compost once a week so they could deal with it for me… But sadly, they shut down.
This basically makes me the perfect candidate for a kitchen composting machine. And it’s why I was honestly really excited to try out the Vego kitchen composter. I hate throwing food away.
But unfortunately, I didn’t like it as much as I thought I would. This machine comes with some major pros & cons, and I’m laying out all my thoughts for you here. I hope my review will help you decide whether or not you want to try it out for yourself.
What I'm covering in this review:
- First: Vego Kitchen Composter basics
- Here’s how it works:
- There are 5 modes to choose from:
- How to start a cycle:
- The accompanying app is optional.
- The footprints: countertop space, energy, & your wallet
- ✅ Setup is easy… But learn from my mistake!
- 👎 “Zero smell” is not a thing.
- 👎 It’s (maybe?) not PFAS-free.
- 👎 Composting ability is limited.
- ✅ Composting is quick & quiet.
- Alternative kitchen composters (& who they are good for)
- This is not real compost.
This guide contains product recommendations and we may receive compensation if you purchase through certain links. Vego sent us the product (thank you!), but they did not provide any additional financial payment for this review and have no say over what is published here. As always, we only make recommendations that are genuine!
First: Vego Kitchen Composter basics
If you’re not already familiar with this type of device, the Vego Kitchen Composter is a countertop machine (roughly the size of an Instant Pot) that turns your food scraps into a usable ‘soil’-type material that you can use in your lawn, garden, or house plants.
(It does not make actual compost, but we’ll get to that in a minute.)
🚮 What’s wrong with putting food in the landfill?
When we throw food waste in the trash and it ends up in a landfill, it goes into an anaerobic environment, which means no oxygen.
Without oxygen, food doesn’t break down the same way it would in nature. Instead, it rots in a process that releases methane, a very potent greenhouse gas.
Composting food waste is a much better option because we can actually turn it into useful soil rather than harmful gas.
Here’s how it works:
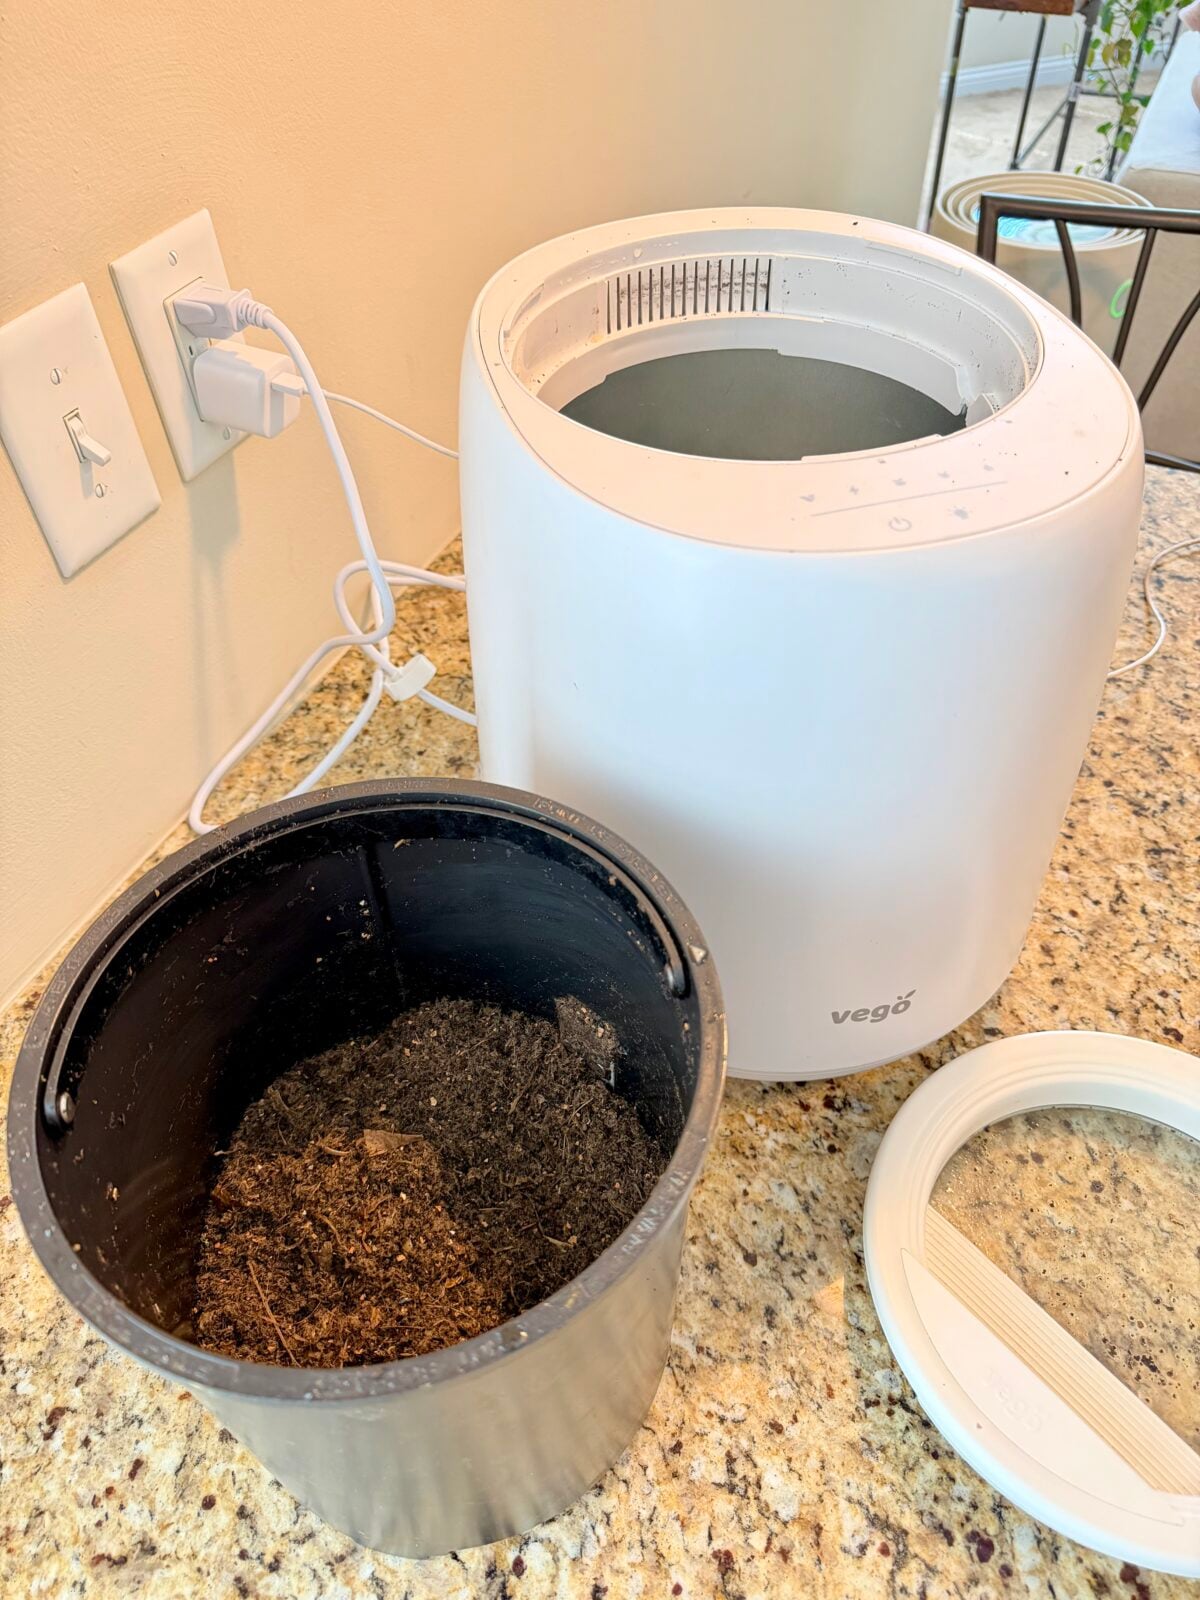
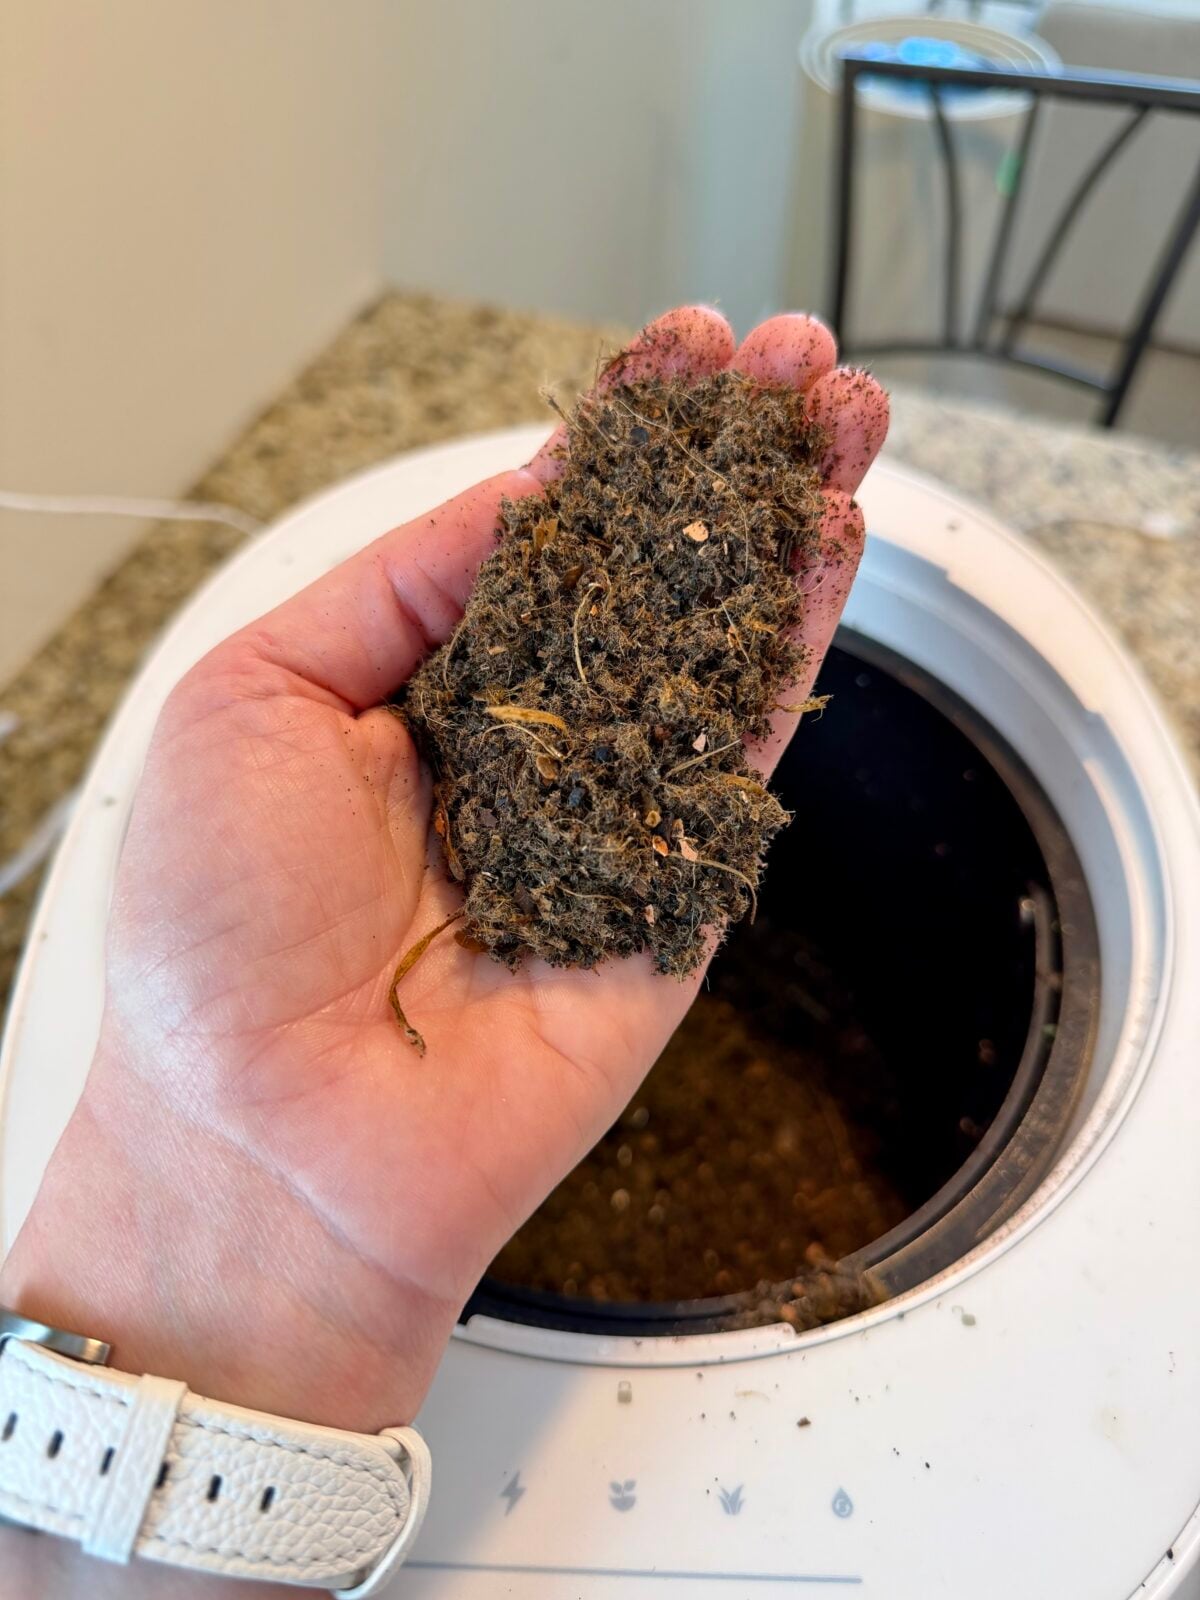
You put your food scraps (well, some of them—you can’t add everything) into the bucket and then press a button to start a cycle. Within about a day, the machine will have turned your kitchen scraps into a usable, nutrient-rich “Vego Meal,” which you can then mix into the soil of your house plants, use in your seed-starters, spread on your lawn to help your grass grow, use as fertilizer in your vegetable garden, or even mix into an existing compost pile.
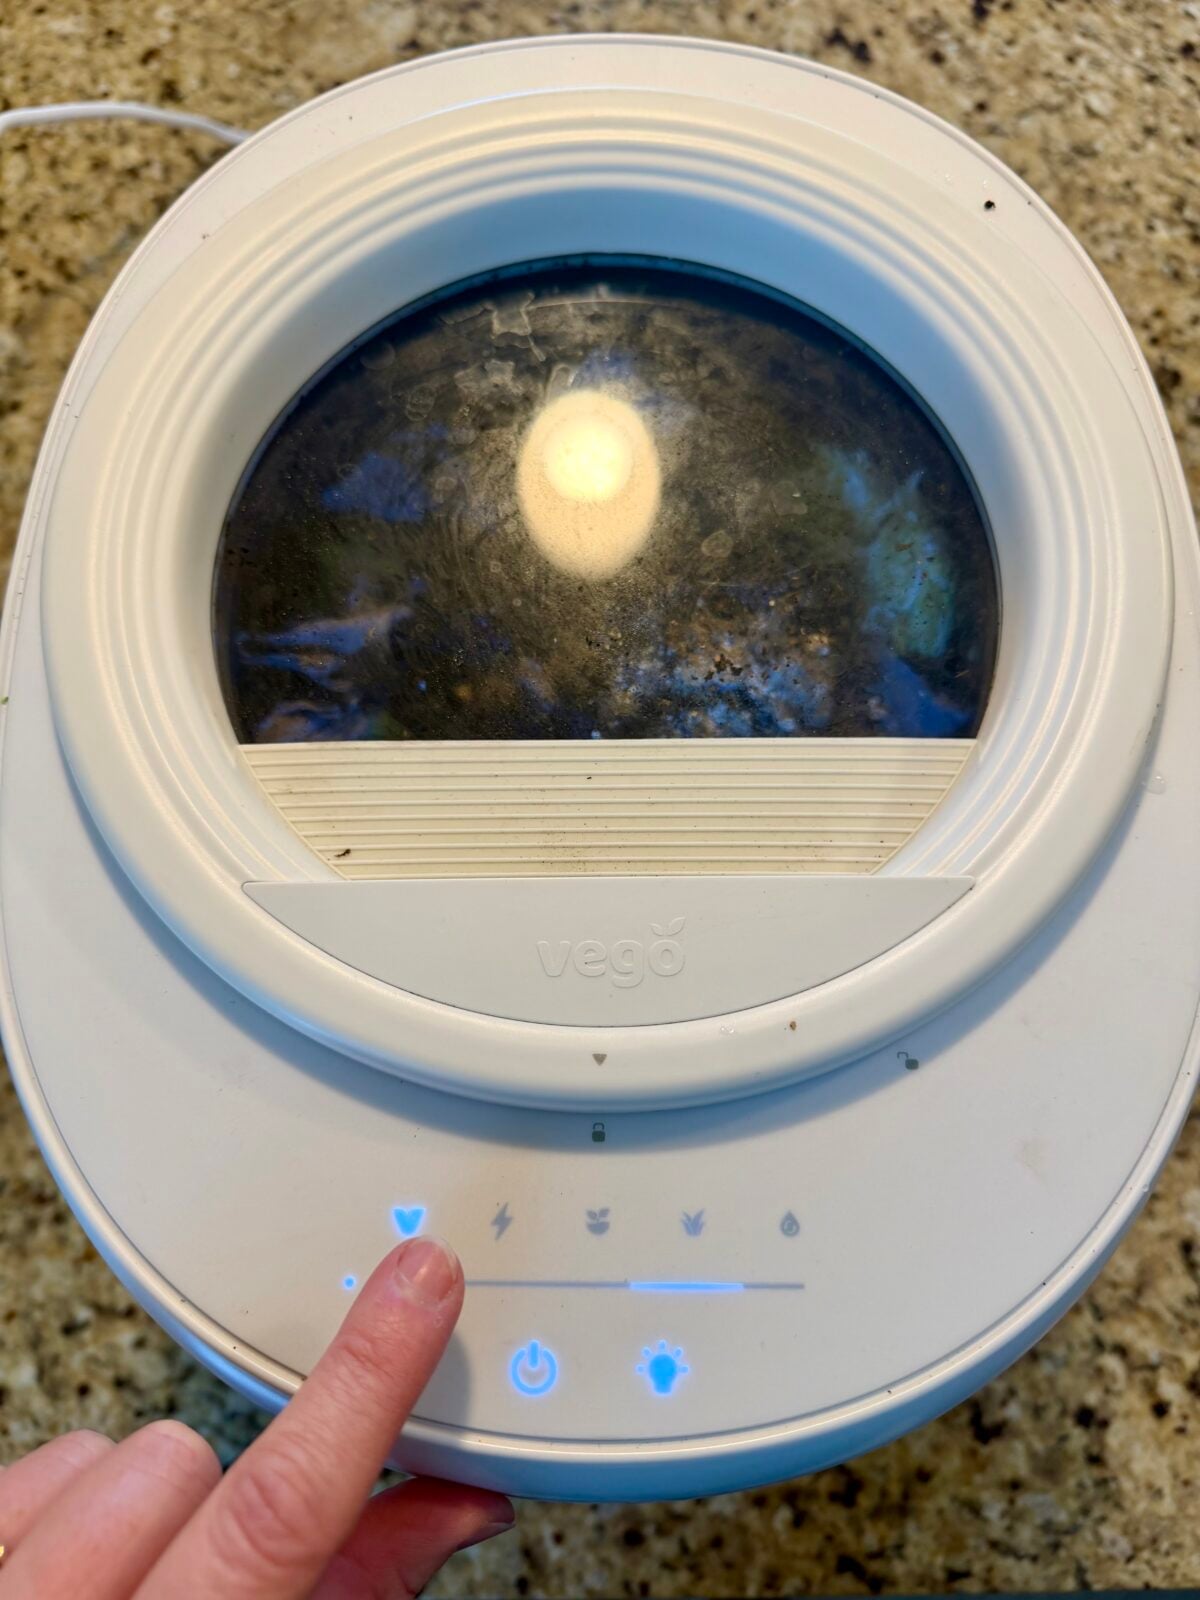
There are 5 modes to choose from:
- Vego Mode: This is the mode most people (including me) use the most often. It processes your waste in 9-24 hours (depending on what you put in), and it produces the most “finished” and bio-active end product, which you can put directly into your garden. (Just make sure you MIX it into the soil using a roughly 10:1 ratio of soil to compost.) One of the best parts about this mode is that you can add scraps to it continually. So you can start a cycle at breakfast, then throw more scraps in there at dinnertime, and it will adjust and keep running accordingly. It will also go into a ‘standby mode,’ which basically means you can keep adding to it for up to 10 days and it will make sure the material inside stays in its nutrient-dense state.
- Express Mode: This cycle is fast–it can get rid of waste in only 2-8 hours. It uses much higher heat, which kills the beneficial nutrients and does not result in a usable, fertilizer-like material. I think you’d really only want to use this one if you need to get rid of a bunch of scraps quickly to avoid putting it into a landfill.
- Fertilize Mode: This one is not for direct planting, but rather to be used as a starter for outdoor compost piles or as a top-dressing for landscape beds. It runs for 9-22 hours and produces a concentrated, semi-composted material that’s rich in active microbes.
- Grass Mode: This one takes 11-24 hours and breaks down your scraps into an even finer-ground material that can be spread over your lawn to help your grass grow.
- Clean Mode: This is a self-cleaning mode where you can just add water to the bucket (no scraps) and it will clean itself. You can also hand-wash the bucket or throw it in the dishwasher.
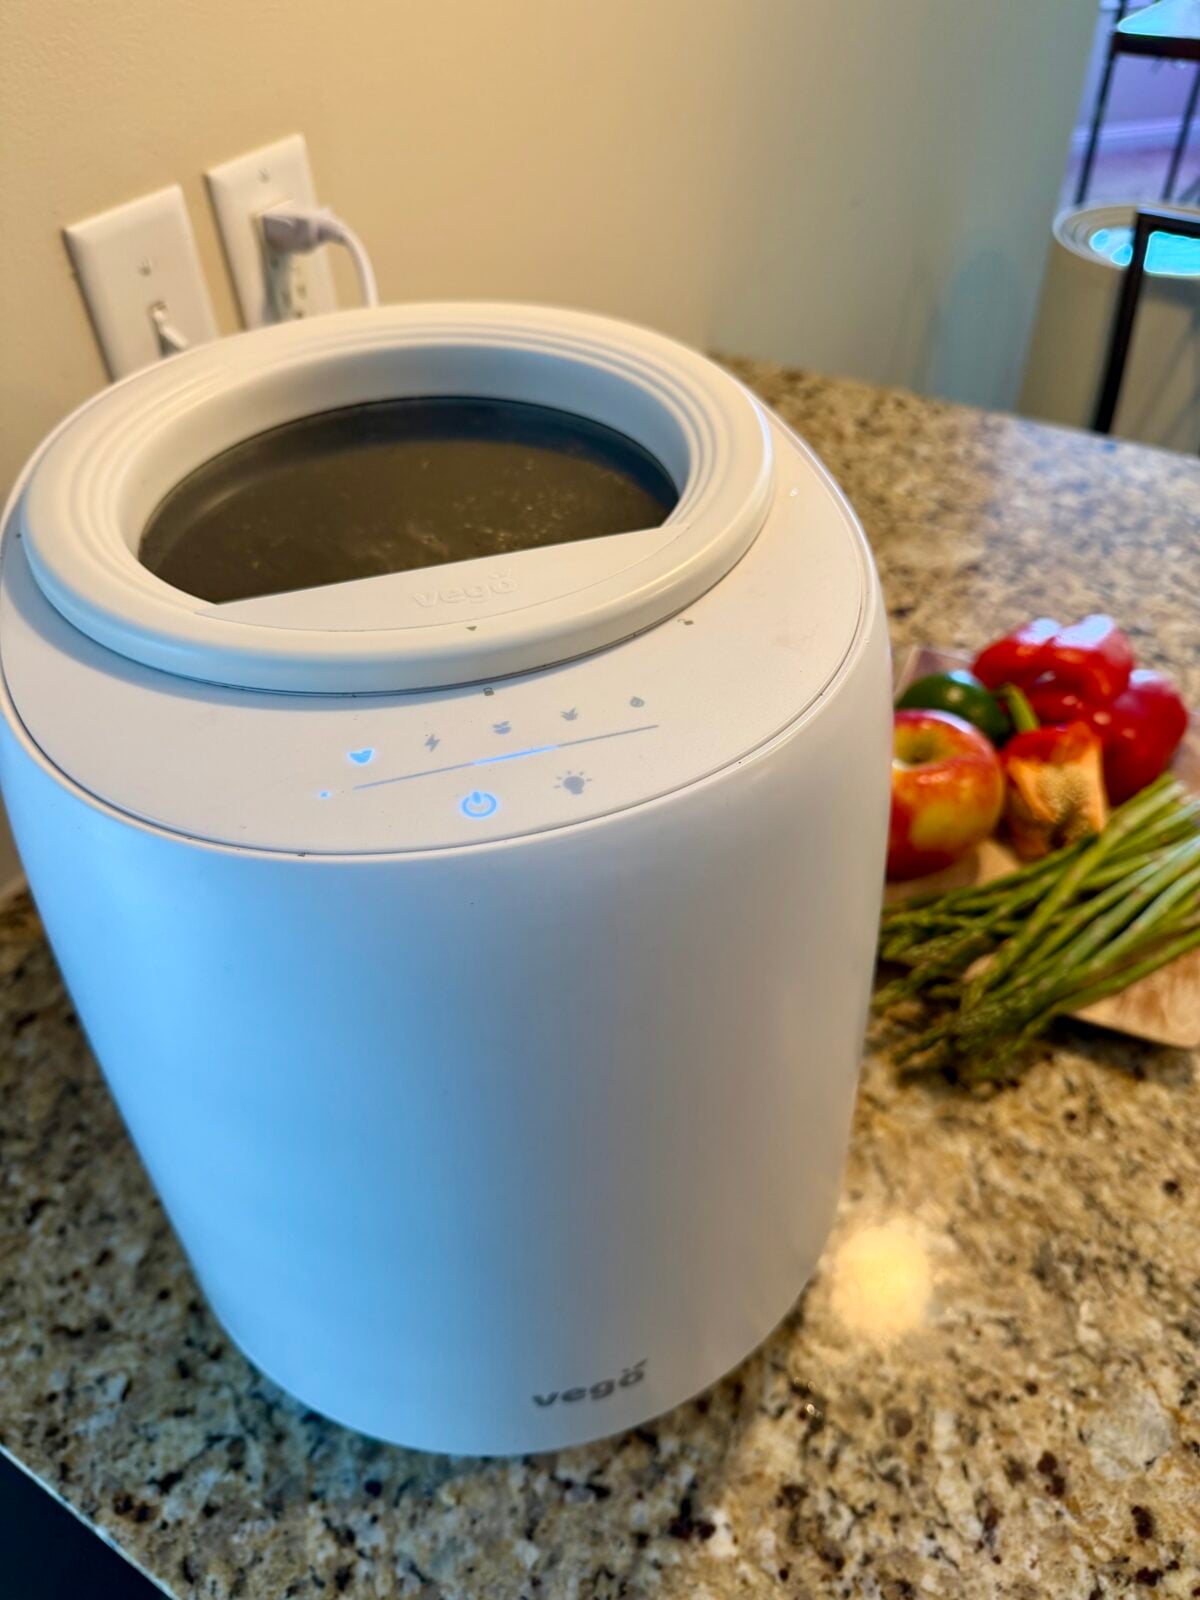
At the time of publication, the composter comes in white or black. I will say that the overall design & aesthetic is nice; it’s sleek, minimalistic, and looks nice on the countertop.
How to start a cycle:
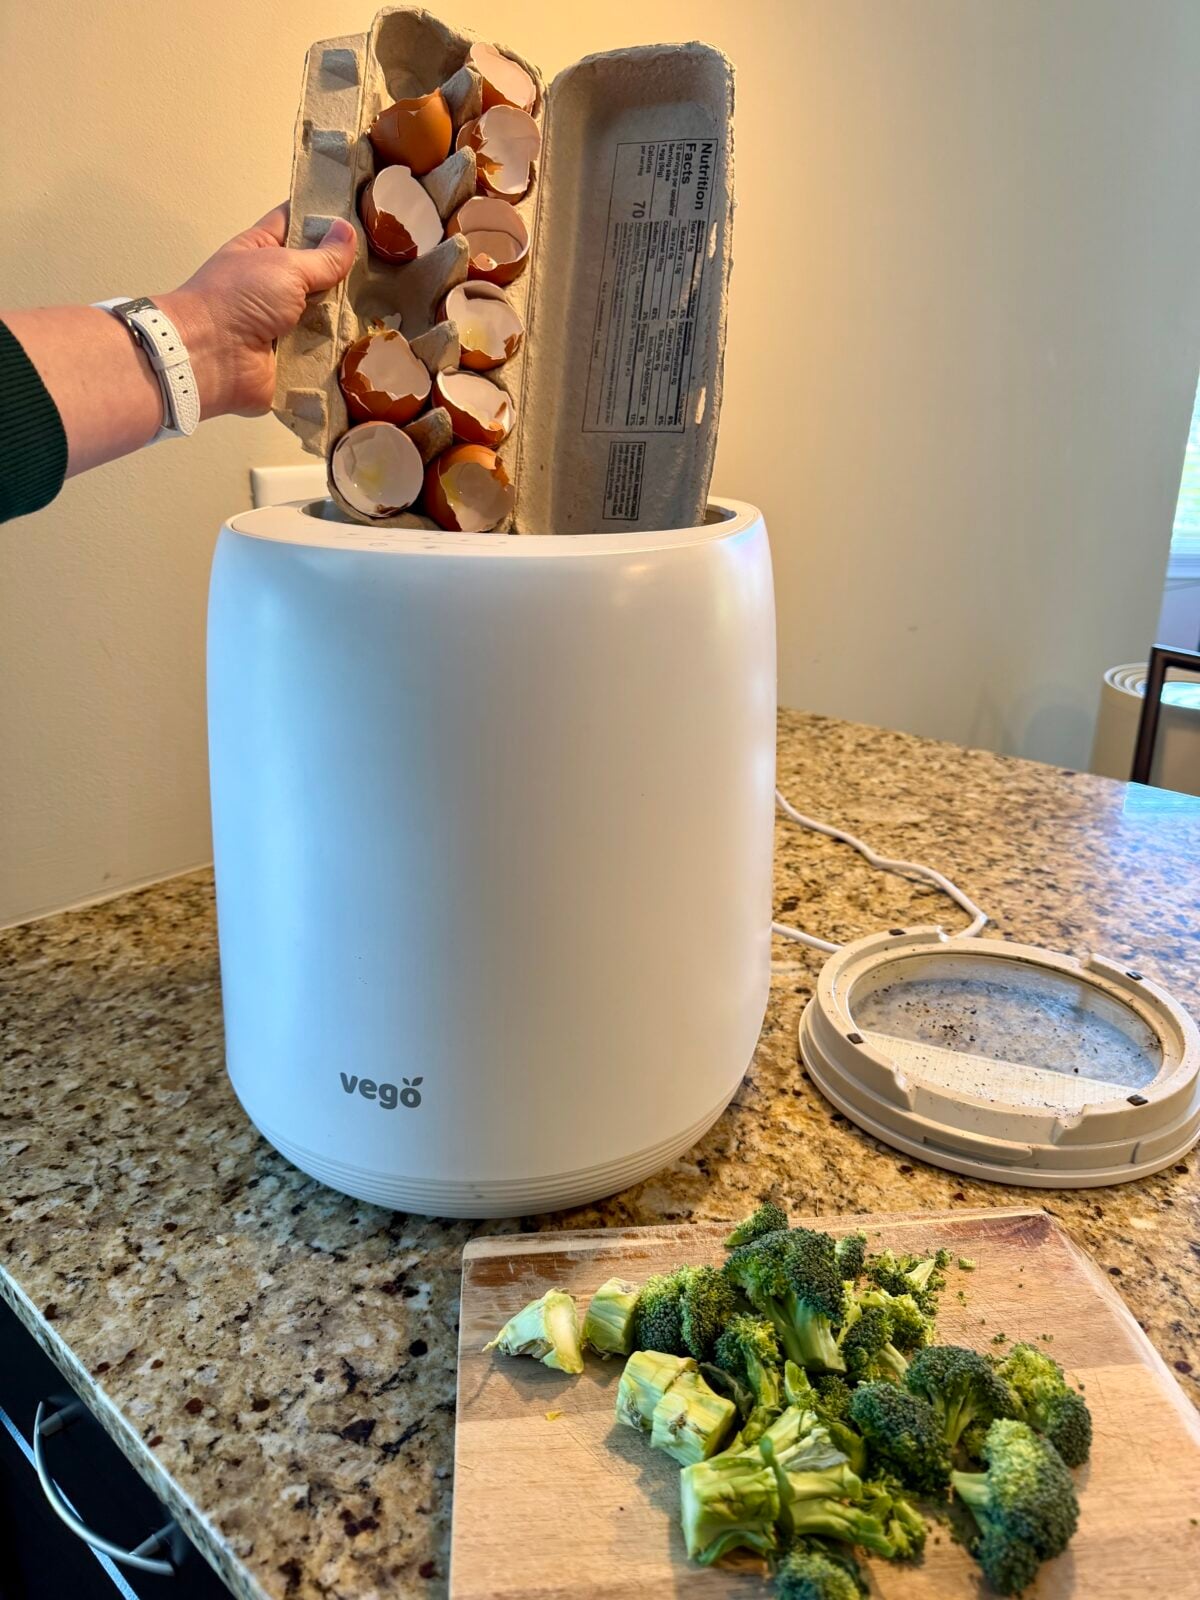
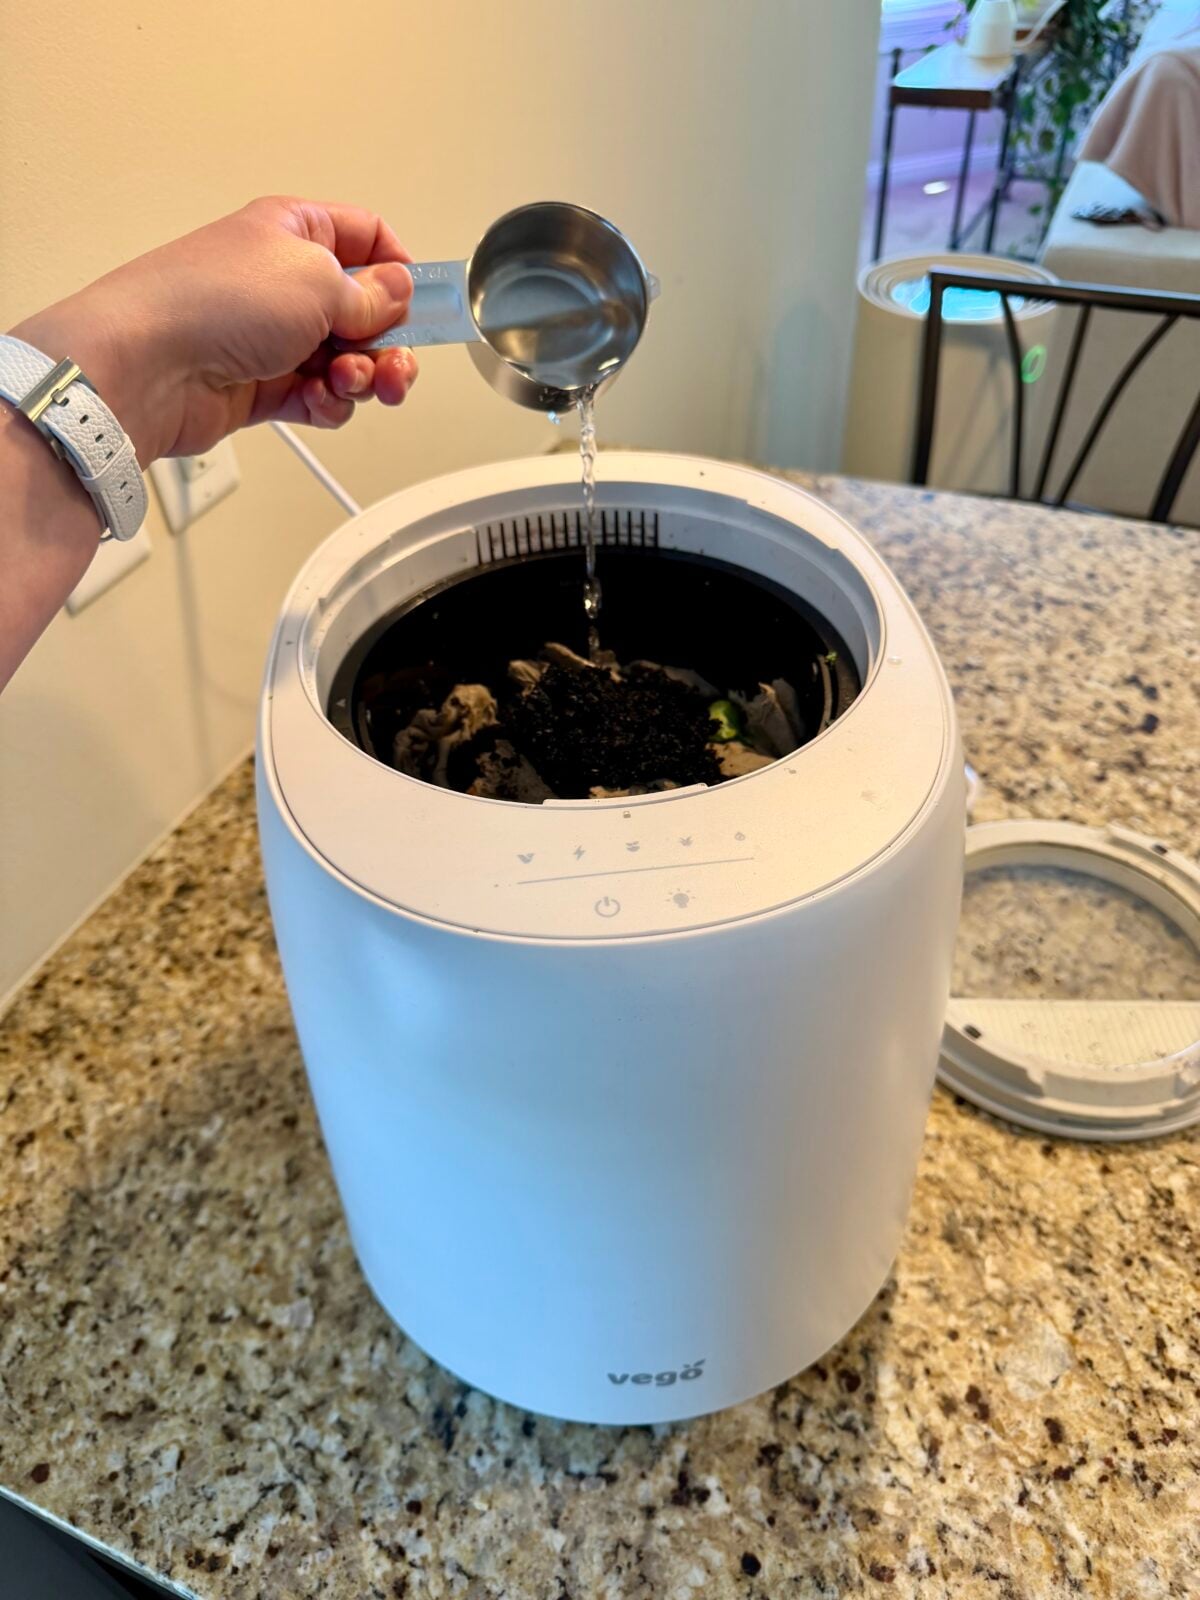
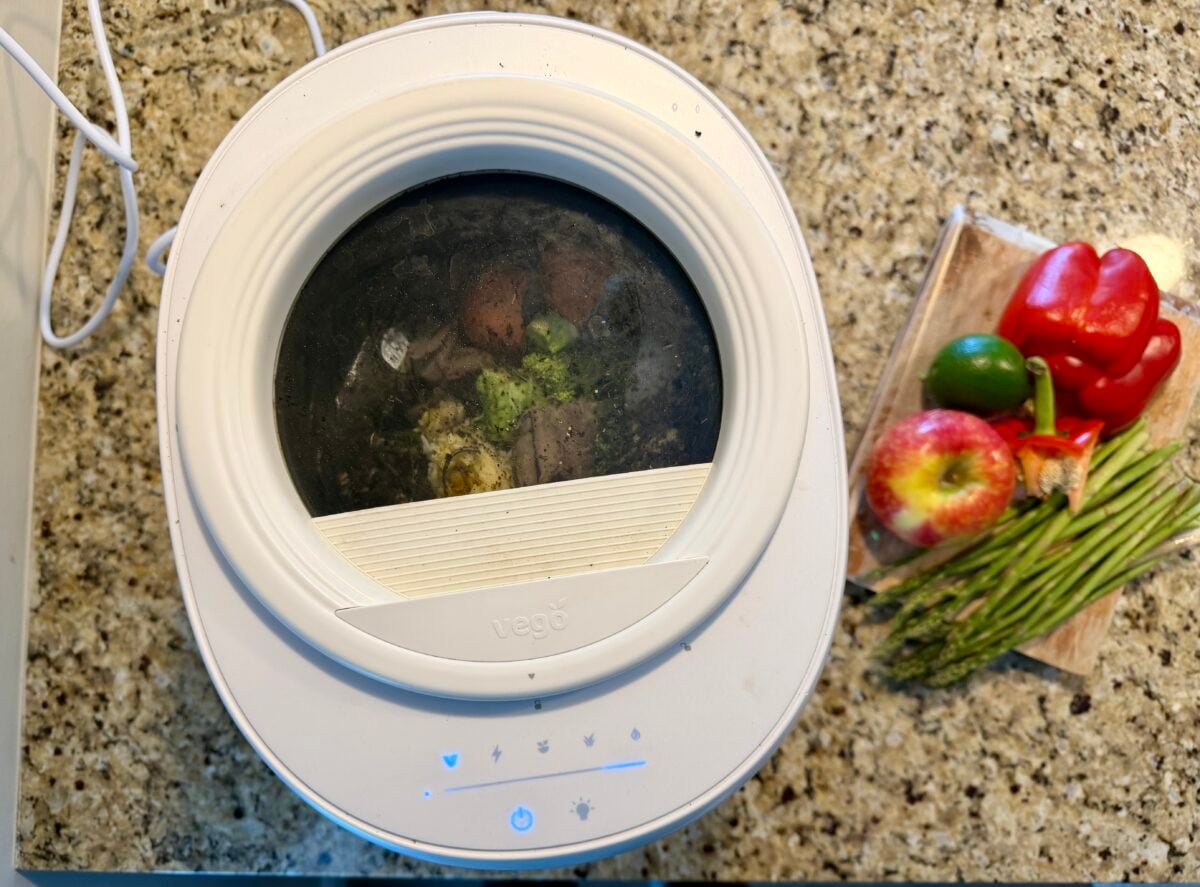
- First you throw in as many scraps as you have, up to the max fill line.
- Then you add about 1/3 cup of water.
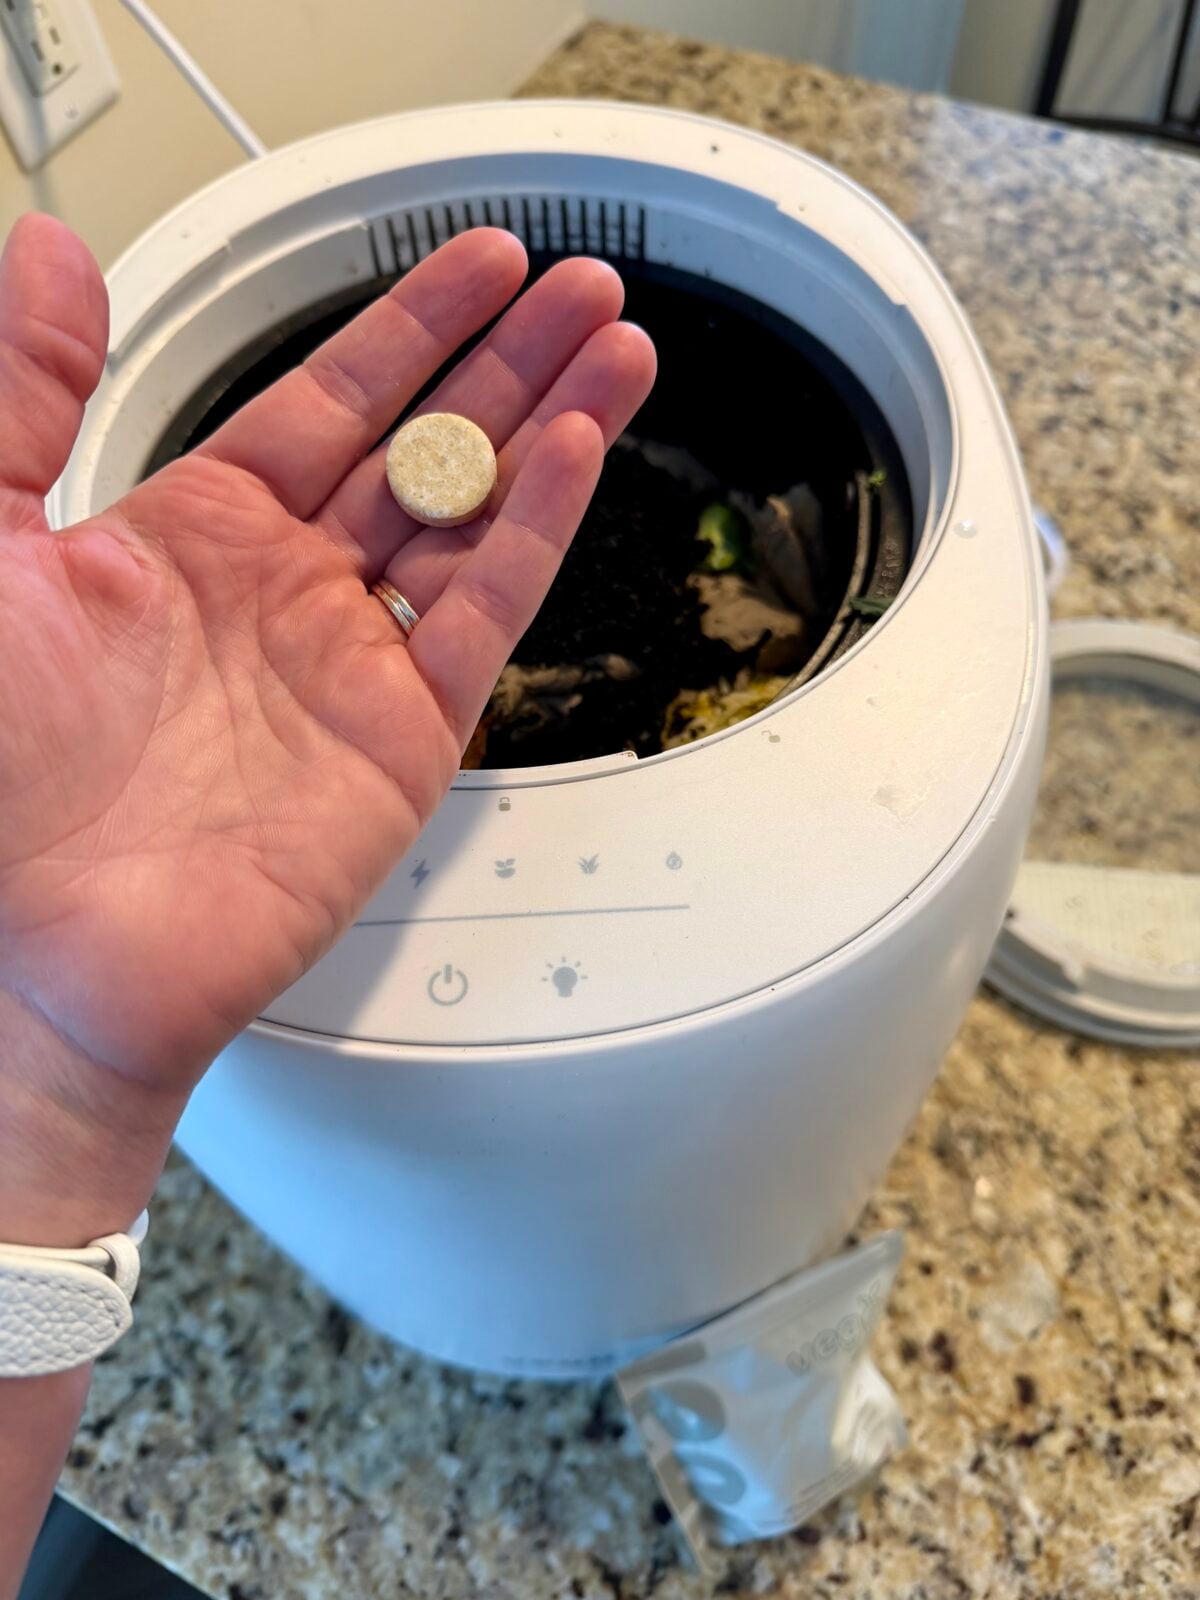
- Also add a VegoTab. VegoTabs are not technically required, but they’re said to help “accelerate and enhance the composting process” and that they are “packed with natural microorganisms that break down organic waste faster and more effectively.” I reached out to them to try and get more info about the specific ingredients and here’s what they said: “Our Vego Tabs are made out of microorganisms (bacteria and fungi enzymes) and dried biodegradable and nutrient medium to hold them. These are selected because they aggressively feed on food scraps, speeding up decomposition and helping to eliminate standard rot odors.” (So… They did not give me the full ingredient list.)
- I crushed my VegoTab up before putting it into the bucket because the video I watched said it would be even more effective that way.
- Choose a mode, press the button, and watch your scraps start to break down. (I will say that the glass lid is kind of cool because you can take a peak inside every once in a while and watch the process happen.)

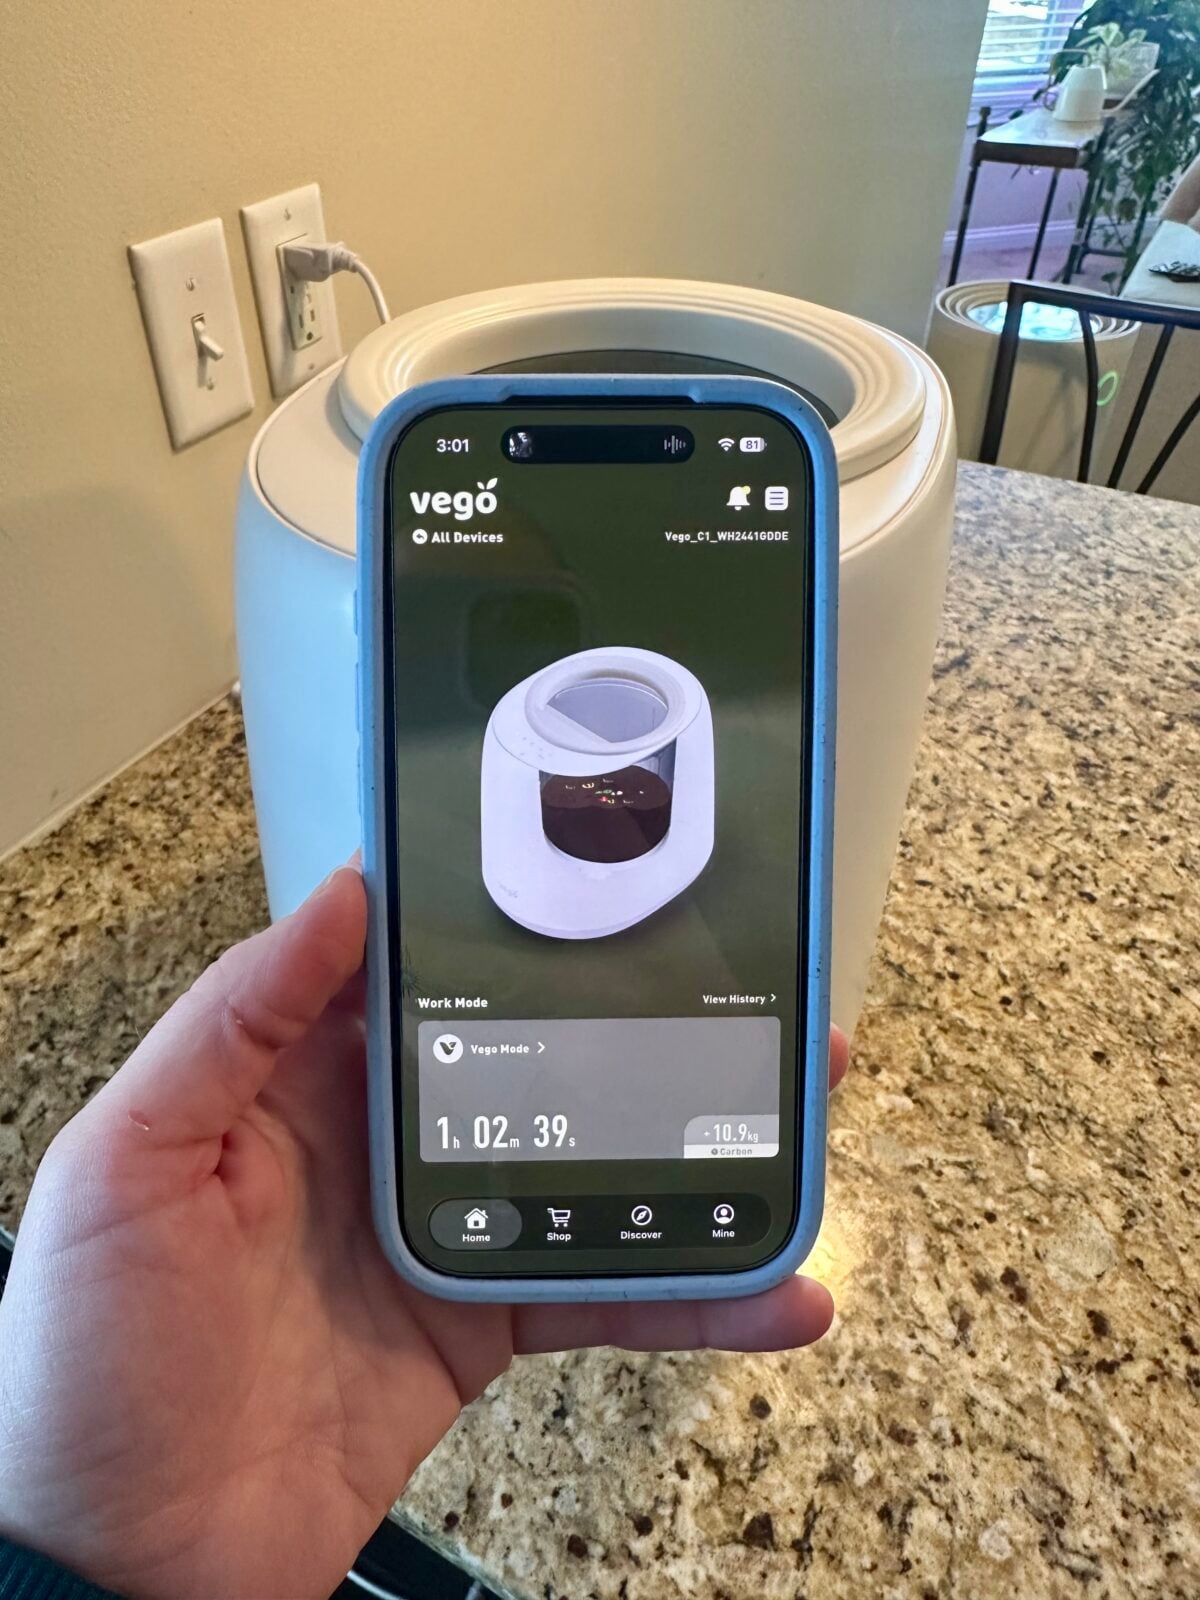
The accompanying app is optional.
The composter comes with a Bluetooth-connected app, which can help you track your composter’s progress.
I appreciate that the app is not required; I find it annoying when devices force me to download yet another thing that’s going to take up space on my phone and send me notifications I don’t want.
Overall, the app is mid. It’s kind of cool to watch your impact add up, but it’s also kind of glitchy and doesn’t really do all that much.
The one thing I did find convenient is that the couple of times when my machine’s blade got jammed, the app sent me a notification that it needed to be fixed.
The footprints: countertop space, energy, & your wallet
Let’s talk about the costs involved.
- Space: I would say the countertop footprint is moderate. Like I said, it’s about the size of other kitchen appliances like an Instant Pot, rice cooker, or air fryer. If you live in a super small space, that might be somewhat significant for you, but obviously it’s a much smaller footprint than a regular compost.
- It does require electricity and produces heat, so it needs to be placed about 6 inches away from the wall for proper ventilation.
- Energy: This is perhaps one of the most controversial aspects of kitchen composters. If part of the whole purpose of composting food scraps is to decrease your environmental footprint, then isn’t using a machine that uses energy to produce, ship, and run kind of… counterproductive? This is obviously a nuanced issue, and you’ll have to decide for yourself where you land on it. But to give you an idea of how much energy we’re talking about, I can tell you that the Vego composter uses a maximum of ~15kWh per cycle, which is about the equivalent of keeping a household lamp on for about 20 hours.
- Price: The cost to your wallet is not insignificant. At publication, the initial cost is $359.95 (before discounts), which includes the machine, your first carbon filter kit, and your first bag of VegoTabs. But then you kind of have to re-buy the VegoTabs and charcoal filter refills regularly, which is going to cost you around $20/month.
- Some people online will tell you that you can save money over time because you won’t have to buy fertilizer for your lawn, garden, or other plants. And while that is something to consider, I honestly doubt it’s going to end up being a net savings for most people. For me, I think this is more of a values-based purchase. My personal motivation for getting a countertop composter was to reduce the amount of food I’m wasting and dumping into the landfill, not necessarily to save money.
✅ Setup is easy… But learn from my mistake!
Setting up the machine is pretty easy overall. You basically just have to pull it out of the box, put the bucket in and lid on, plug it in, and start using it.
BUT! There’s one step you don’t want to forget.
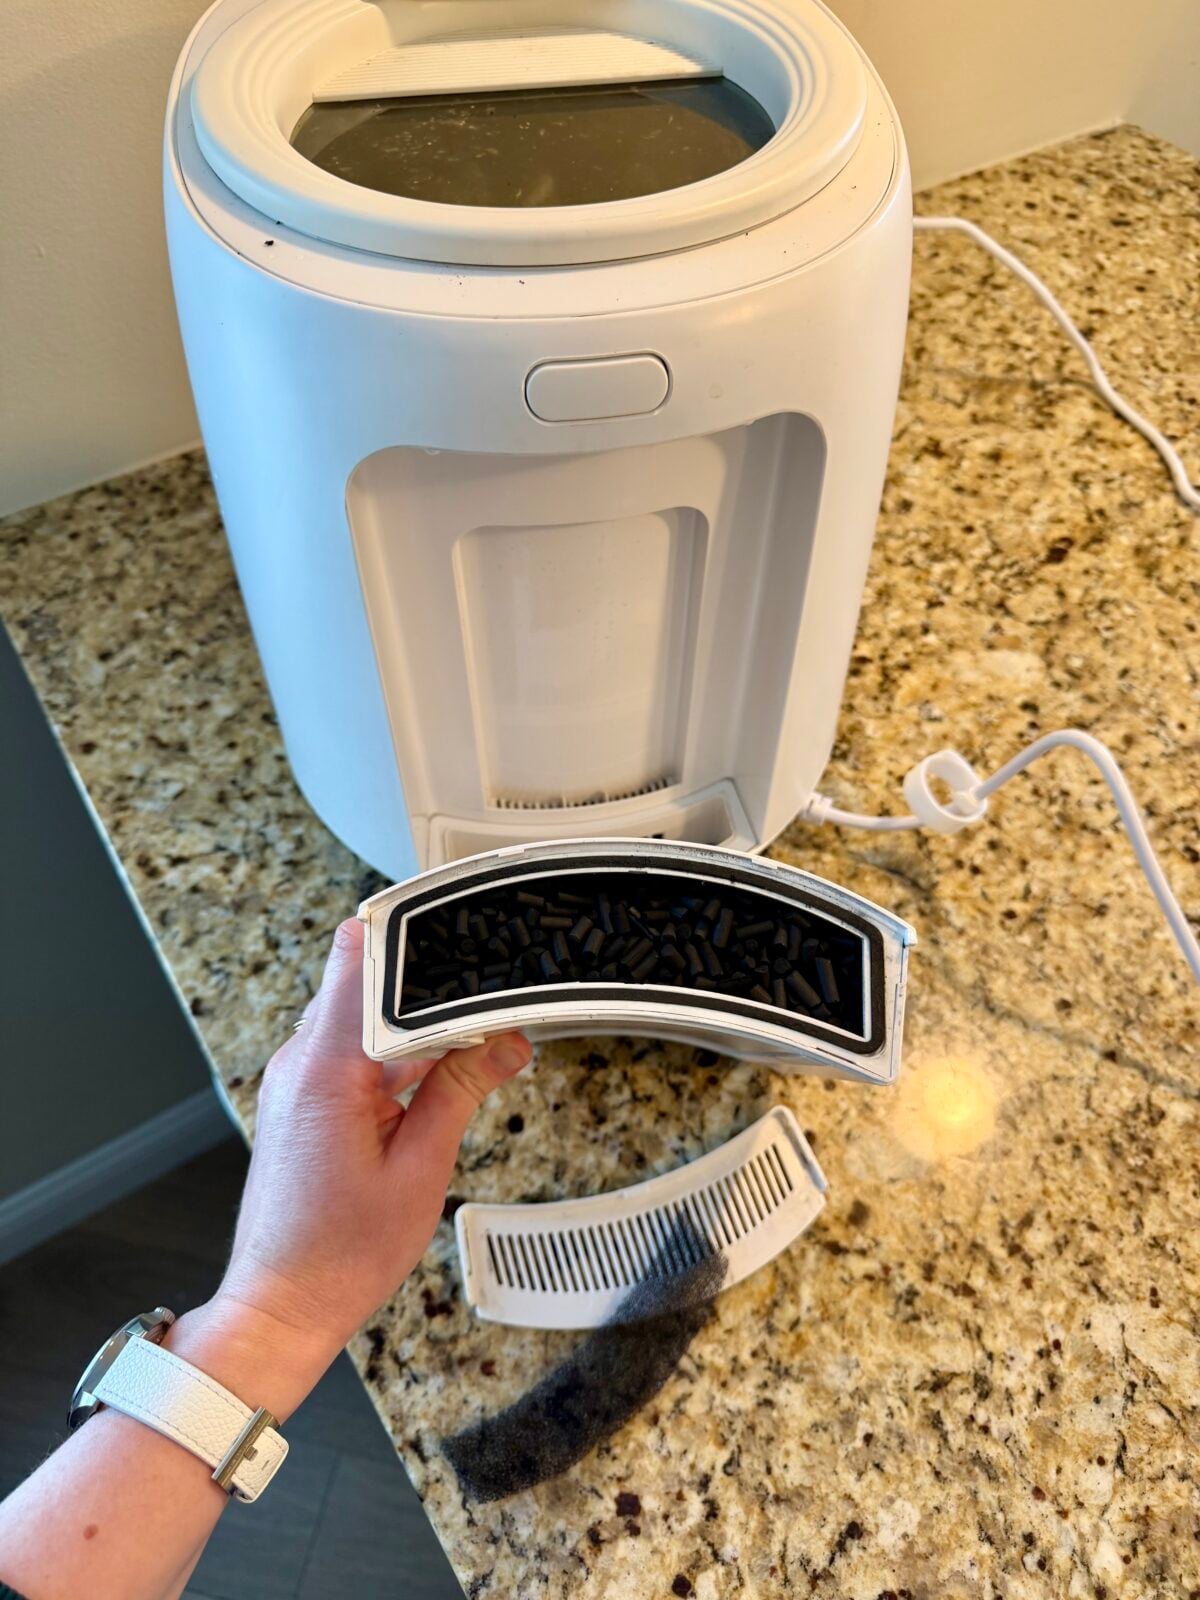
I don’t know why I assumed that there was a charcoal filter in the machine already and that the one it came with was an extra refill, but I did… Which means that the first time I ran the machine, there was no filter in it. 🤦♀️
It smelled pretty bad. I thought: “There’s no way this is going to work,” before it occurred to me to check the filter. Which was, of course, empty.
I filled it and ran another cycle, and the smell was significantly reduced.
That said…
👎 “Zero smell” is not a thing.
You will find some reviews online of people saying there is absolutely NO smell from this composter.
I cannot say the same thing from my experience.
With the filter in place, the smell is relatively minimal, and it’s not even the worst smell in the world. It’s not pleasant, but it doesn’t smell like sewage either.
But it’s there.
Considering that my husband and I are both pretty sensitive to smells, this is one of the biggest downsides for us.
If I had somewhere else to put the composter—like a patio, garage, greenhouse, or even a shed with a power outlet—that could potentially be a game changer. I think if I could put it in a place where it was a little more ‘out of the way,’ the slight smell might not bother me. But with it currently in the kitchen of our apartment, the smell is bothersome.
To minimize this as much as possible, I’ve taken to running the machine about once a week. With the Vego Mode, you can technically run the machine continually; you can add scraps as you generate them and the machine will adjust accordingly. But what I do instead is put my scraps into a container in the freezer throughout the week. Then I put them all in the composter at once, filling the machine as much as I can, and I run the machine through a full cycle. Then I immediately get rid of the “Vego Meal”—putting it outside or whatever—and then clean the bucket.
That way I’m only dealing with the smell for about one day a week.
But obviously, whether or not this system will work for you will depend on how much waste you’re generating. Your household might generate enough scraps to where you need to run the machine every other day.
👎 It’s (maybe?) not PFAS-free.
This is one of the other major downsides from my POV.
I honestly did not think to ask before getting the machine if the inner bucket contains a PFAS coating. If it had occurred to me beforehand, I wouldn’t have gotten it.
As soon as I pulled the metal bucket from the box, I could tell it almost certainly had a PTFE (aka Teflon) coating on it. This is the same kind of coating that is used on conventional non-stick pots and pans, and it’s a material I spend a lot of time helping people reduce their exposure to.
Although there are PFAS-free non-stick coatings on the market these days, those have a different look and feel than conventional Teflon, which is why I am almost certain this bucket is made with PTFE.
When I asked Vego’s customer support about this, here’s what they told me:
“For the Vego Kitchen Composter, the inner bucket is designed with a food-safe, non-stick coating to help prevent residue buildup and make cleaning easier. The materials used are compliant with FDA and safety standards.
The product is not designed with PTFE / Teflon-type coatings, and we do not intentionally use PFAS-based materials in the bucket surface. The coating is a standard non-stick treatment focused on safety and durability for food waste processing.”
When I followed up to ask what the non-stick coating was made out of (explaining that it does not seem to me to be ceramic/sol-gel, which would be the most likely PFAS-free alternative), the representative was not able to answer my question. She did send me some paperwork from the product development team, which I appreciated. However, it still doesn’t tell me what material is used. It just uses generic terms like “non-stick coating” and “resinous and polymeric coatings”.
So, while I can’t say for sure that the bucket’s coating is made of Teflon, I’m almost certain it is.
And while the bucket is not likely to leach large amounts of PFAS particles into your compost material while the bucket is in good shape, as soon as there is one scratch on that Teflon coating, thousands or even millions of nano/microparticles could be released into your “Vego Meal.” If you then go spreading that soil material around on your lawn and garden, you’re putting more PFAS into your environment.
👎 Composting ability is limited.
I’ll give you the last big downside from my experience using the composter: I thought it could compost a lot more than it actually can.
If you’re not already aware, there are two primary “buckets” that potentially-compostable scraps can go into:
- What is generally referred to as “home” or “backyard” compostable: this is a lower-temperature pile that can deal with things like fruits & vegetables, eggshells, coffee & tea, grains, and certain paper products (in the right ratios).
- “Industrial” or “commercially” compostable: this includes not only “home compostable” scraps but also harder-to-breakdown materials like certain bioplastics (think ‘plant-based plastic bags and utensils) and meat/dairy.
I thought that a $360 machine that requires energy would be able to handle a lot more of the industrial stuff. Wouldn’t that be one of the perks of investing in a machine like this?
Here you can see the full list of what the Vego composter can and cannot compost. As you can see, the list is not that different than what you can put in the backyard compost pile. The biggest difference is that you can put small amounts of meat & dairy in the Vego, while you should not put that in a standard backyard compost. There are even some things—like nut shells, woody matter, and certain paper products—that you can put in a backyard compost that you cannot put in the Vego.
Some (conflicting) reports online say that you can put bioplastic in the Vego, and I did try this once. I chopped up a bioplastic bag (one that specifically said it was commercially compostable) into smaller pieces to make it easier for the machine to process, but it didn’t work. It actually just ended up jamming the blade at the bottom and I had to take out the bag scraps and throw them away.
I had mixed results with putting paper products in the Vego. Used coffee filters and tea bags seemed to do fine (I just took off the tea bag string beforehand so that it wouldn’t jam the blade). But a lot of times things like paper towels or ripped up paper take-out containers would kind of ‘float up’ to the top of the bucket and would not break down. I eventually figured out that if I wet down the paper products first and then rip them up and mix them in with the other food waste, that usually solves the problem.
In short: I thought I was getting something closer to a mini industrial composting machine with this, and it turns out I was not.
✅ Composting is quick & quiet.
I know I’ve done a lot of complaining about this device so far, but it’s not all bad!
One of the pros is that the machine is pretty quiet. It does have a little whirring sound when it’s running, but it never bothered me. Just a little white noise.
I also really appreciate how quickly you can break down your food waste into something usable—24 hours or less. With a regular backyard compost, it can take anywhere from a month to two years for scraps to break down all the way, and that obviously requires a certain amount of maintenance and know-how.
Using a countertop composter like the Vego is obviously a much easier and more accessible option.
Alternative kitchen composters (& who they are good for)
Despite all of my grumblings, I still think some people will like this composter.
And I appreciate the fact that there’s still a lot of potential here. These kitchen countertop composters are still a relatively new invention. The first to market (that I know of) was a brand called Naturemill, which I don’t think exists anymore. Then there was the Vitamix FoodCycler, followed by Lomi, which came out in 2021 and really started to popularize the idea. Nowadays, there’s Mill, Reencle, and Foodcycler.
It seems that with every new brand and each updated version, these products get better—the sensors, the airflow, the capacity. And I totally respect that in order to get to a closer-to-perfect product, you have to go through some iterations first. I applaud these brands for trying to make food waste reduction more accessible to people, and I could totally see myself being more excited about a different version down the road.
So that being said, here are the types of people who may be interested in trying one:
- if you live in an apartment and do not have access to a yard/patio/balcony where you could make your own real compost pile
- if you have a real compost but you live in a cold climate and are not able to use your compost in the winter. (I read that some folks will use their kitchen composter during the cold months, save the Vego Meal in a bucket or something, and then add it to their regular compost when it warms up.)
- if you just don’t have the time/energy/capacity/desire to learn how to set up and manage a regular compost
This is not real compost.
Keep in mind that what these kitchen composters generate is not real compost. (This is true not just of Vego but of all of these types of machines.)
You should think of it more like a “soil amendment” or “pre-compost.” It is a nutrient-dense material that can be good for your soil and plants, but the output actually requires a lot more time and decomposition to become true “compost.” This is why Vego recommends you use your “Vego Meal” with your soil (using a roughly 10:1 ratio) as opposed to using it as soil. You can read more about the distinctions here and here.
I hope this Vego composter review has helped you decide whether or not this would be worth a try for you and your lifestyle. If you do decide you want to try the Vego composter for yourself, you can get it here:
My pros & cons on the Vego kitchen composter
PROS:
- Convenient & accessible option for reducing food waste: good for renters, folks in small spaces or cold climates, & others who can’t have a regular compost
- Much faster than a regular compost (cycle is 24 hours or less)
- Sleek aesthetic that looks nice in the kitchen
- Quiet
- Mobile app is available but not required
- Built-in sensors & “Vego Mode” allow you to continually add scraps throughout the week
- Comes with different modes for different needs
- It’s kinda fun to watch your scraps break down through the glass lid on top
CONS:
- There is a smell
- (Probably) not PFAS-free
- Cost: initial ($360 for the device) and ongoing ($20/month for the tablets and filter refills)
- It cannot handle commercially-compostable products (like bioplastics)
- Does not produce actual compost (more of a ‘pre-compost’)
- Requires energy to run
- Generates heat (not a big deal, but worth noting if kids are around)
- The blade at the bottom of the bucket jams sometimes