Skincare was one of the first things I started detoxing at the beginning of my low-tox journey. At the time, I was struggling with constant allergies, skin rashes, and inflammation. I had tried every conventional route for years with little to no relief. It’s crazy to see myself now—I haven’t had a rash or inflammation in years, and my allergies are sporadic. I’ve made so many improvements!
A big part of this change in my health and overall well-being has been the commitment to using natural products. It was very overwhelming at first to read the labels of “natural” products only to see a laundry list of mysterious or potentially toxic chemicals.
This constant frustration led me to start making my own skincare products early on. There are many things I still buy, like face soap and moisturizer, but I also love creating recipes and playing with ingredients. Nothing beats knowing exactly what’s in the product I’m putting on my skin—especially for someone with as many sensitivities as me.
If there’s something I’ve always struggled with, it’s body lotion. It was one of the first things I started making myself. I feel like the options for non-toxic lotion are limited… Plus, I don’t like big plastic jugs, and bar lotions tend to be so expensive!
So for this article, I’m making and trying a few different easy homemade lotions made with natural & non-toxic ingredients.
I give you a range of options—from a super simple 2-ingredient recipe to more complex ones with herb-infused oils. I know starting to DIY things can feel like a lot, but if you ask me, it’s actually pretty easy, affordable, and fun.
BTW, if you’re looking for even more easy DIY skincare recipes (like cleanser, toner, etc.), check out this article.
What this article covers:
- The Basics of Crafting Your Own Body Lotion
- My 3 Nourishing, Non-Toxic DIY Lotion Recipes for Beginners
- Common Toxic Ingredients In Store-Bought Body Lotion
- Artificial fragrances
- Formaldehyde and formaldehyde-releasers
- Parabens
- Isothiazolinone preservatives
- PFAS or “forever chemicals”
- 🍋 Join Thousands of Subscribers Reducing Toxic Chemicals
This guide contains product recommendations and we may receive compensation if you purchase through certain links. As always, we only make recommendations that are genuine!
The Basics of Crafting Your Own Body Lotion
There are a few basics that it’s good to learn when you’re making DIY stuff. I didn’t know any of this when I started, but I wish I did. I learned the hard way! But now I know why certain things didn’t mix well together, or why certain recipes I tried just didn’t work.
Plus, learning some basics allows you to create stronger recipes from the beginning. This means less frustration, less wasted ingredients, and more satisfaction with your DIY products!
Most lotions rely on three main ingredients: oil, water, and an emulsifier to bring the water and oil together. With just 3 core ingredients, you can make hundreds of different recipes, playing with different oils and emulsifiers.
One of the basic things that’s important to learn is the properties of the different oils you can use so that you create something that aligns with your skin’s needs.
There are many options, but these are some of the most popular ones and their properties:
- Olive oil: antioxidant, shelf-stable, balanced, moisturizing
- Castor oil: thick & shiny, anti-inflammatory, protective (but can stain fabrics)
- Sweet almond: can act as an emollient; light & easily absorbed into the skin
- Coconut oil: Cooling, drying, protective, cleansing
- Avocado oil: Moisturizing, nourishing, rich
- Apricot kernel: very light, deeply moisturizing, easily absorbed, and neutral.
For emulsifiers, these are a few natural, effective options to use:
- Beeswax
- Carnauba wax
- Candelilla wax
You’ll want to avoid using synthetic emulsifiers like emulsifying wax (usually petroleum-derived), polysorbate, stearate, steareth, cetearyl and ceteareth. They’re commonly found in lotion and they can cause allergies, irritation, and damage to your skin barrier.
The issue with many lotions is actually the preservatives used to maintain the shelf life of an emulsion. We’re not using preservatives for these homemade recipes, so the lotions you make last for a few months only… But you can make smaller batches and commit to using them all before they go bad, or gift some to family and friends!
With these few ingredients, you can already create so many different types of lotion. And by adding essential oils, you open up even more possibilities for scents, properties, and recipes to make.
In this article, you’ll find three recipes. The first one is a very simple, oil-based lotion that uses no water, which means no need for the emulsifying process. This is so you can have an easy and accessible recipe that lasts a while—especially if you’re very new to DIY and feel a little intimidated by it. (Waterless products last a lot longer without preservatives than water-based ones do.)
The other two recipes below get more into the process of emulsification, but they’re still simple enough for absolute beginners!
My 3 Nourishing, Non-Toxic DIY Lotion Recipes for Beginners
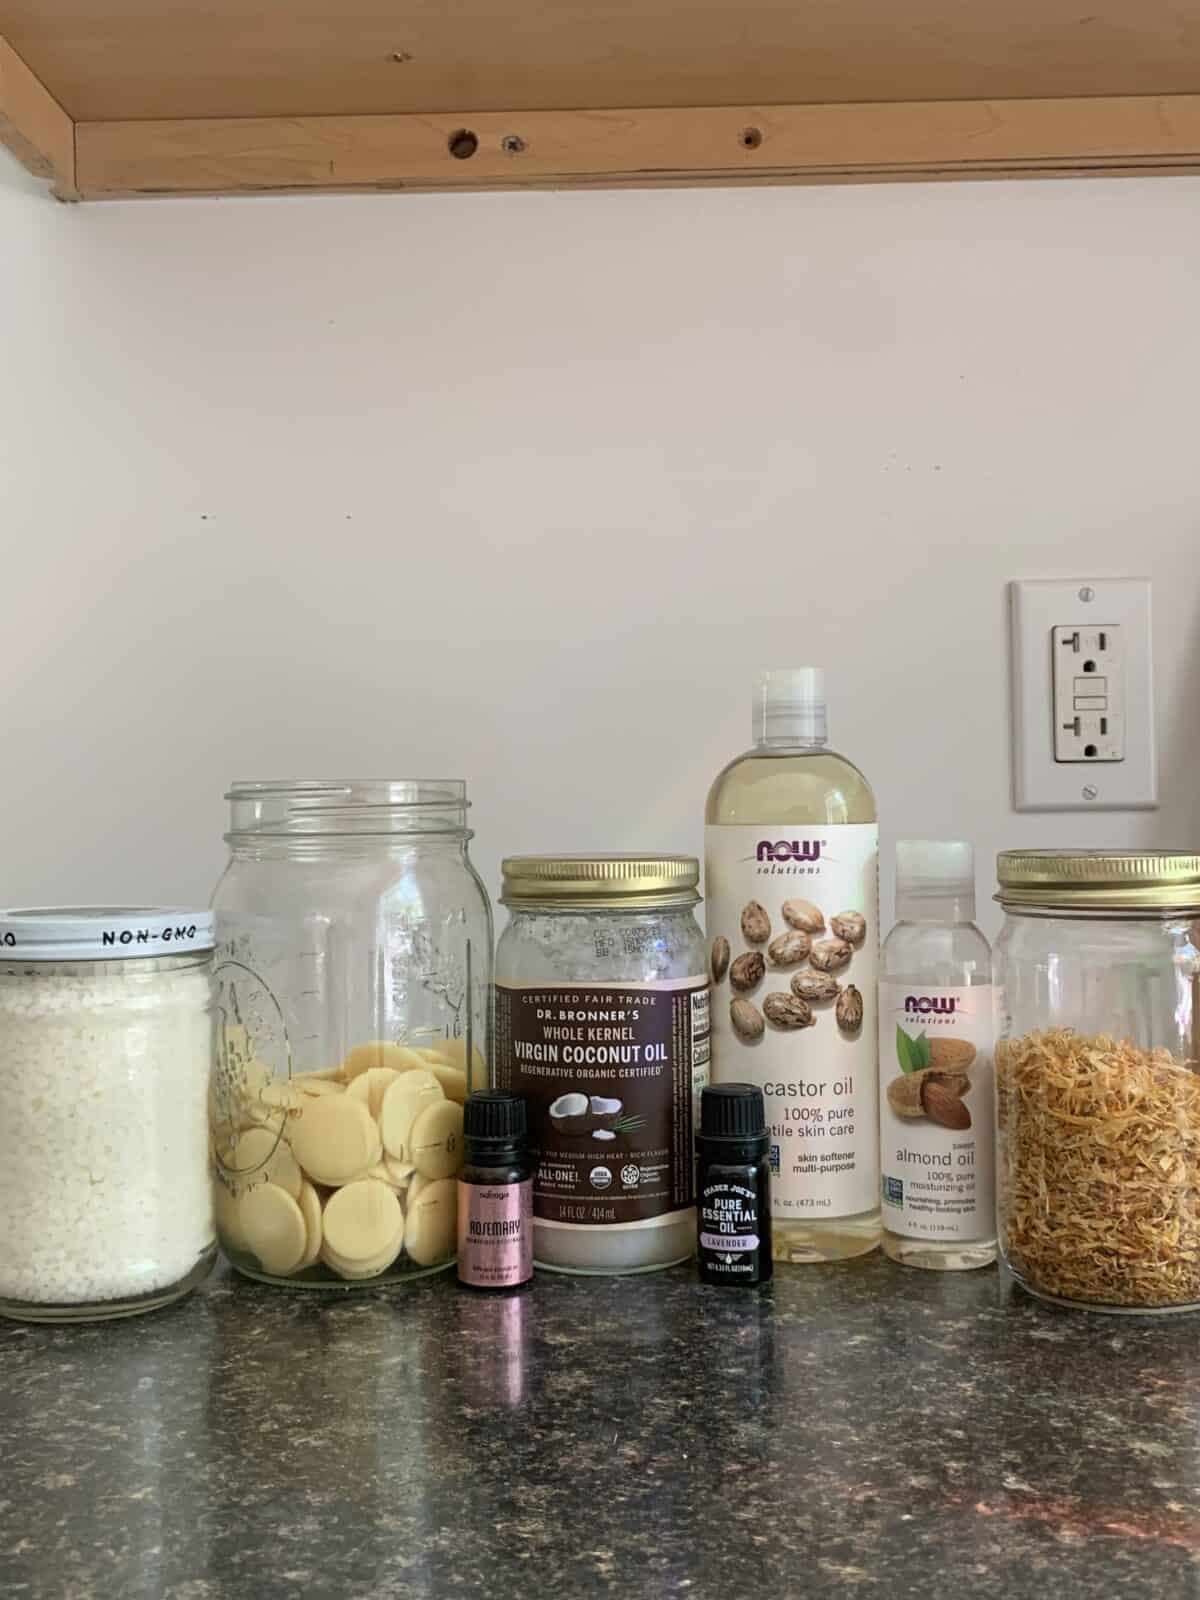
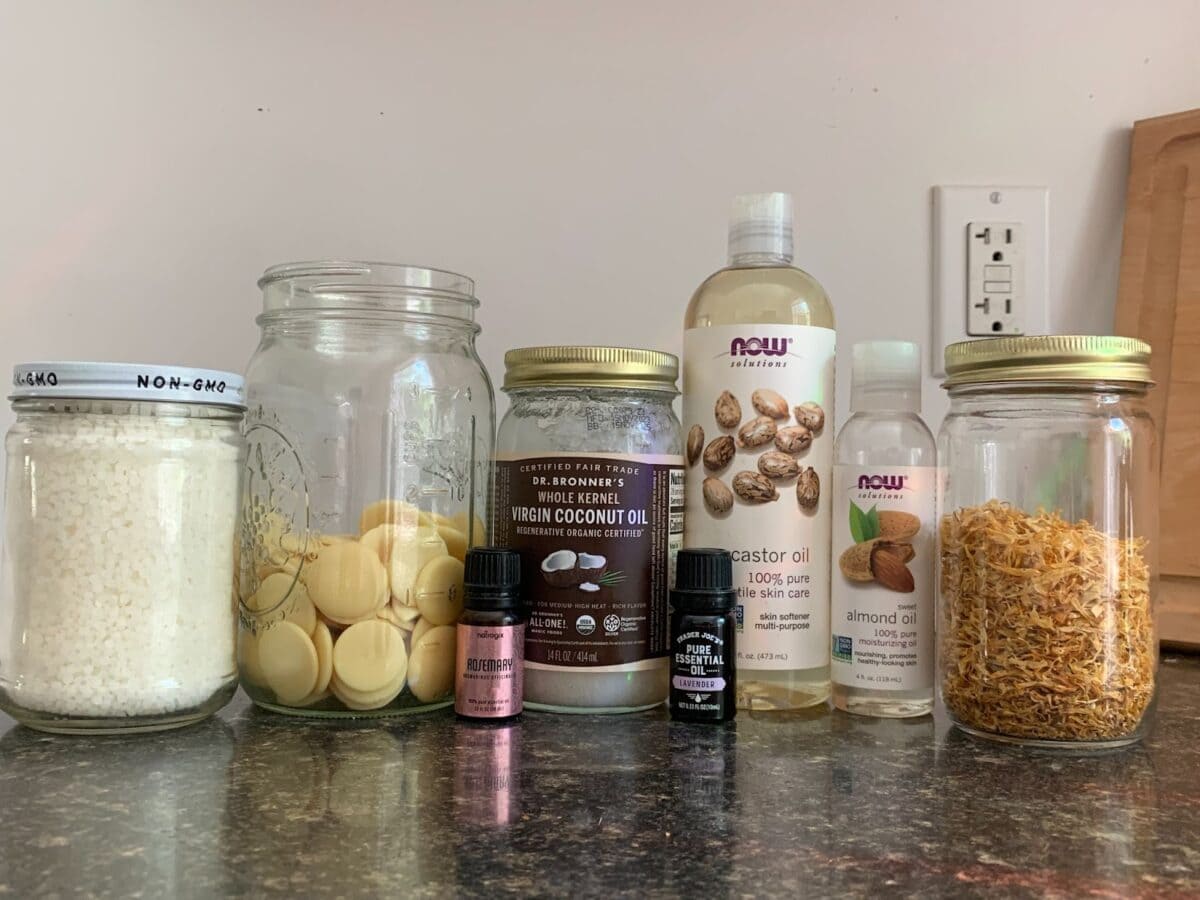
Now, let’s dive into the recipes. I share ingredients and directions for each, but you’ll also need a few tools in hand—especially for the last two recipes. (You can use these tools for many DIY projects too!)
Some basic tools are:
- glass jars with lids
- a saucepan
- a heat-proof container for double boilers
- a cheesecloth
- a hand mixer or whisk
- measuring cups
- labels
- a funnel
1. Nourishing Coconut Oil Lotion
I included this recipe because I know how overwhelming it can be to get started in the DIY world, and I wanted to show you that it doesn’t have to be. Whether you’re making skincare, home cleaners, or body care, there is always a simple recipe you can get started on. And this is the perfect recipe for that!
This is actually my go-to lotion. I’ve been using it for years now because it’s easy, accessible, and so good for the skin. Plus, it doesn’t require much time or tools. You can put it together in under 5 minutes and be set for months.
Although I do love making more complex recipes, I don’t always have time for it. And since I always keep coconut oil in my cabinet, I can always reach for this.
The recipe idea came from the book The Hands-On Home: A Seasonal Guide to Cooking, Preserving & Natural Homekeeping by Erica Strauss. She shares a mix-and-match recipe with different oils you can use and different essential oils, but more on that below.
Ingredients:
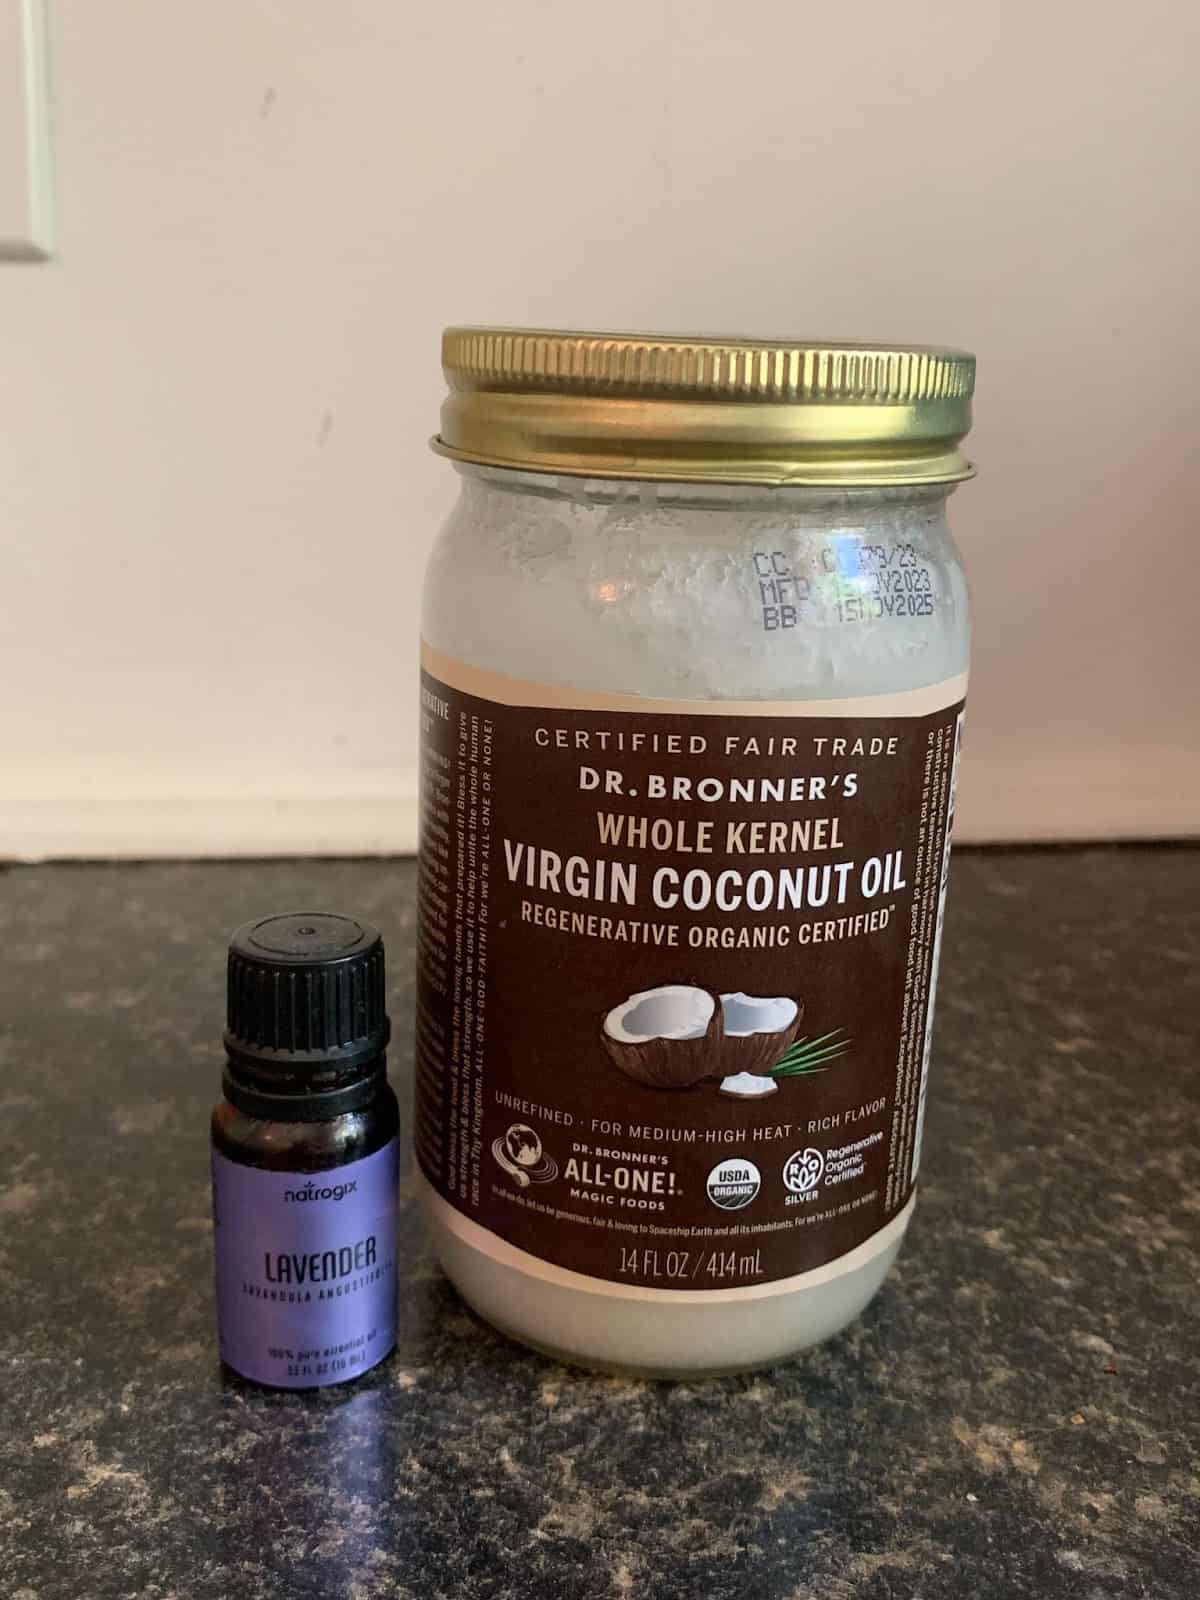
- ½ cup of coconut oil
- 20-30 drops of lavender essential oil
Directions:
Simply bring together the coconut oil and the lavender essential oil and mix to incorporate. Coconut oil hardens in cooler weather, so melt it if you need to in order for the ingredients to combine.
You can keep it in the fridge for a more solid texture, or a room temperature for a liquid lotion.
My thoughts on this recipe:
Like I said, this is my go-to lotion. I use Dr. Bronner’s Virgin Coconut Oil and I just love the effective simplicity of using it as body lotion. Something I also do is add about 50 drops of essential oil to a new jar of (melted) coconut oil, shake it, and it’s good to go.
Sometimes, I don’t even add essential oils and just use the pure coconut oil. However, it’s nice to get the scent and skin benefits from the essential oils.
One thing I love about this recipe is the endless possibilities of lotions you can create. You can try out any carrier oil + any essential oils and see what works best for you. You already know the properties of a few different carrier oils, so go with that and make this recipe yours. These are a few ideas:
- Olive oil + chamomile essential oil
- Apricot kernel oil + rosemary essential oil
- Sweet almond oil + tea tree and lemon essential oil
I find coconut oil to work great for my skin, but it might not be the best option for everyone. That’s why it is good to know your options. If coconut oil is too heavy, or if it clogs your pores, then apricot kernel or rosehip might be better suited for you.
The finish of this lotion can feel oily since that’s the only ingredient used. To help your skin absorb it quicker, it’s best to apply it right after showering when your pores are more open and ready to absorb. This lotion is also fantastic for dry brushing—ideally right before you shower.
Overall, I love this recipe and use it regularly, but I do feel like sometimes my skin needs a little more nourishment, which is when I make recipes similar to the ones below.
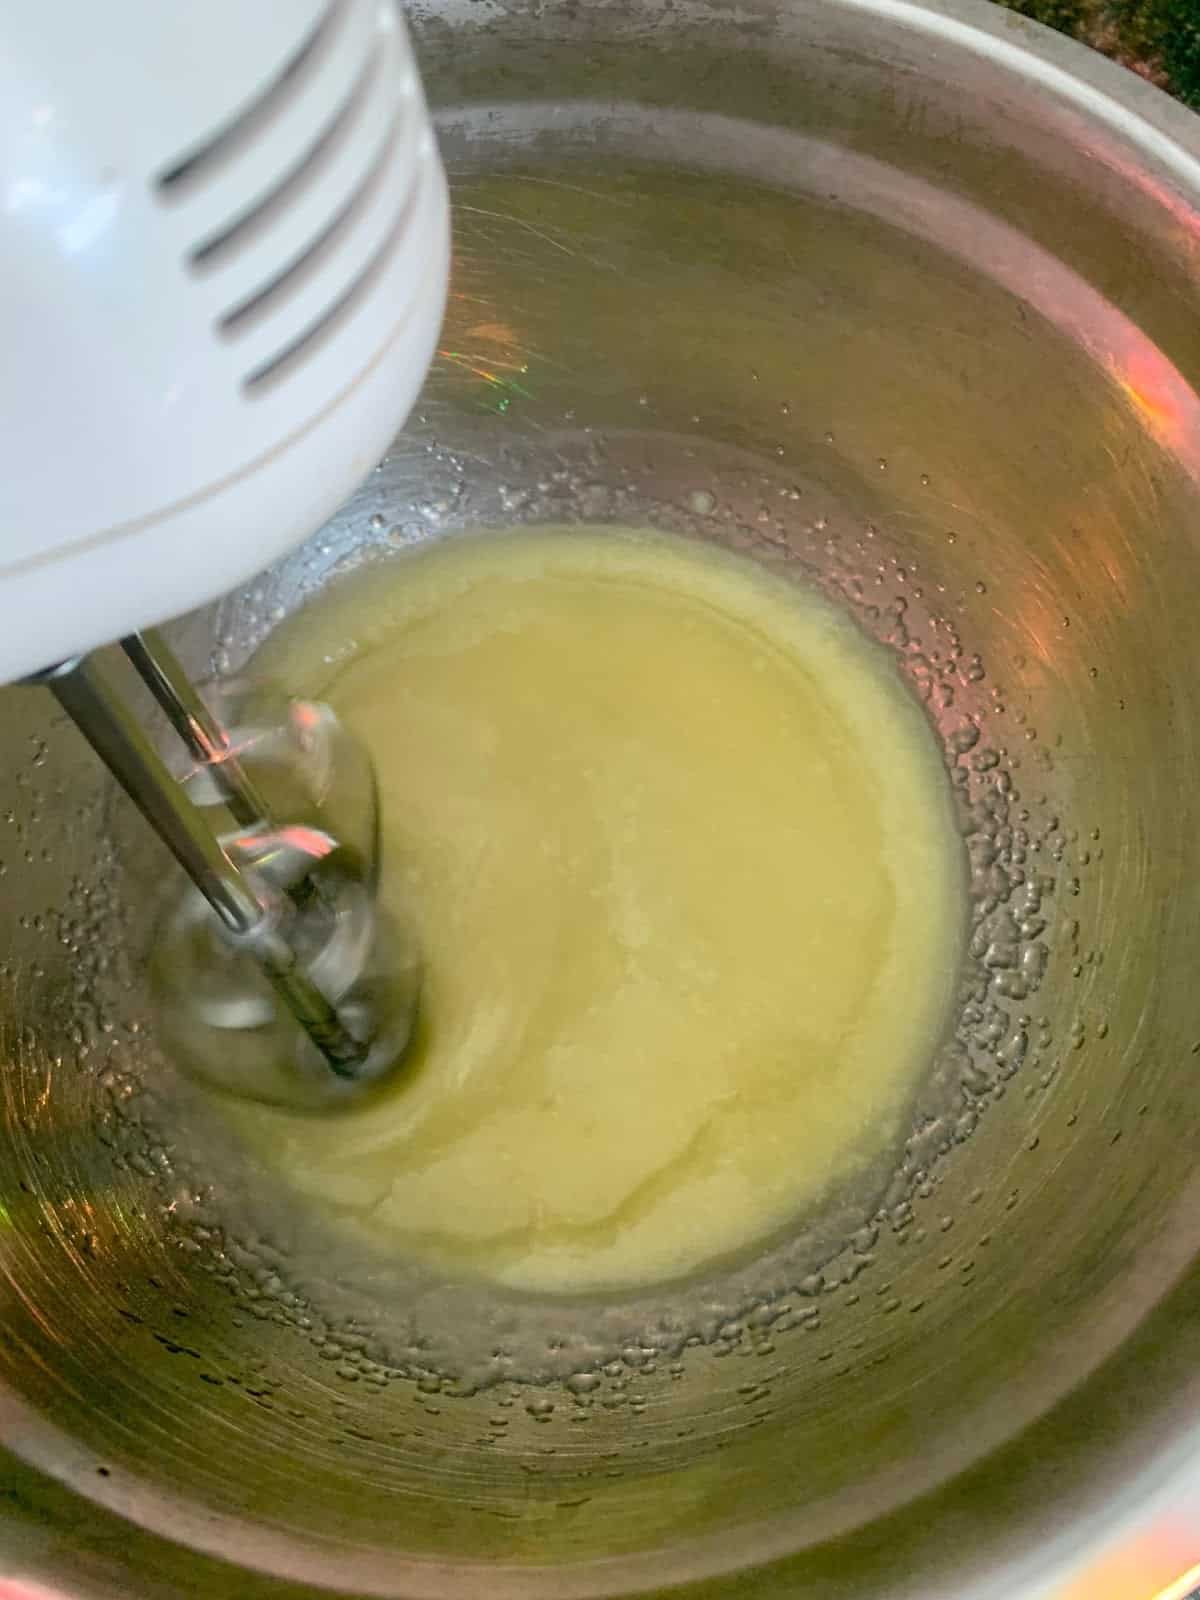
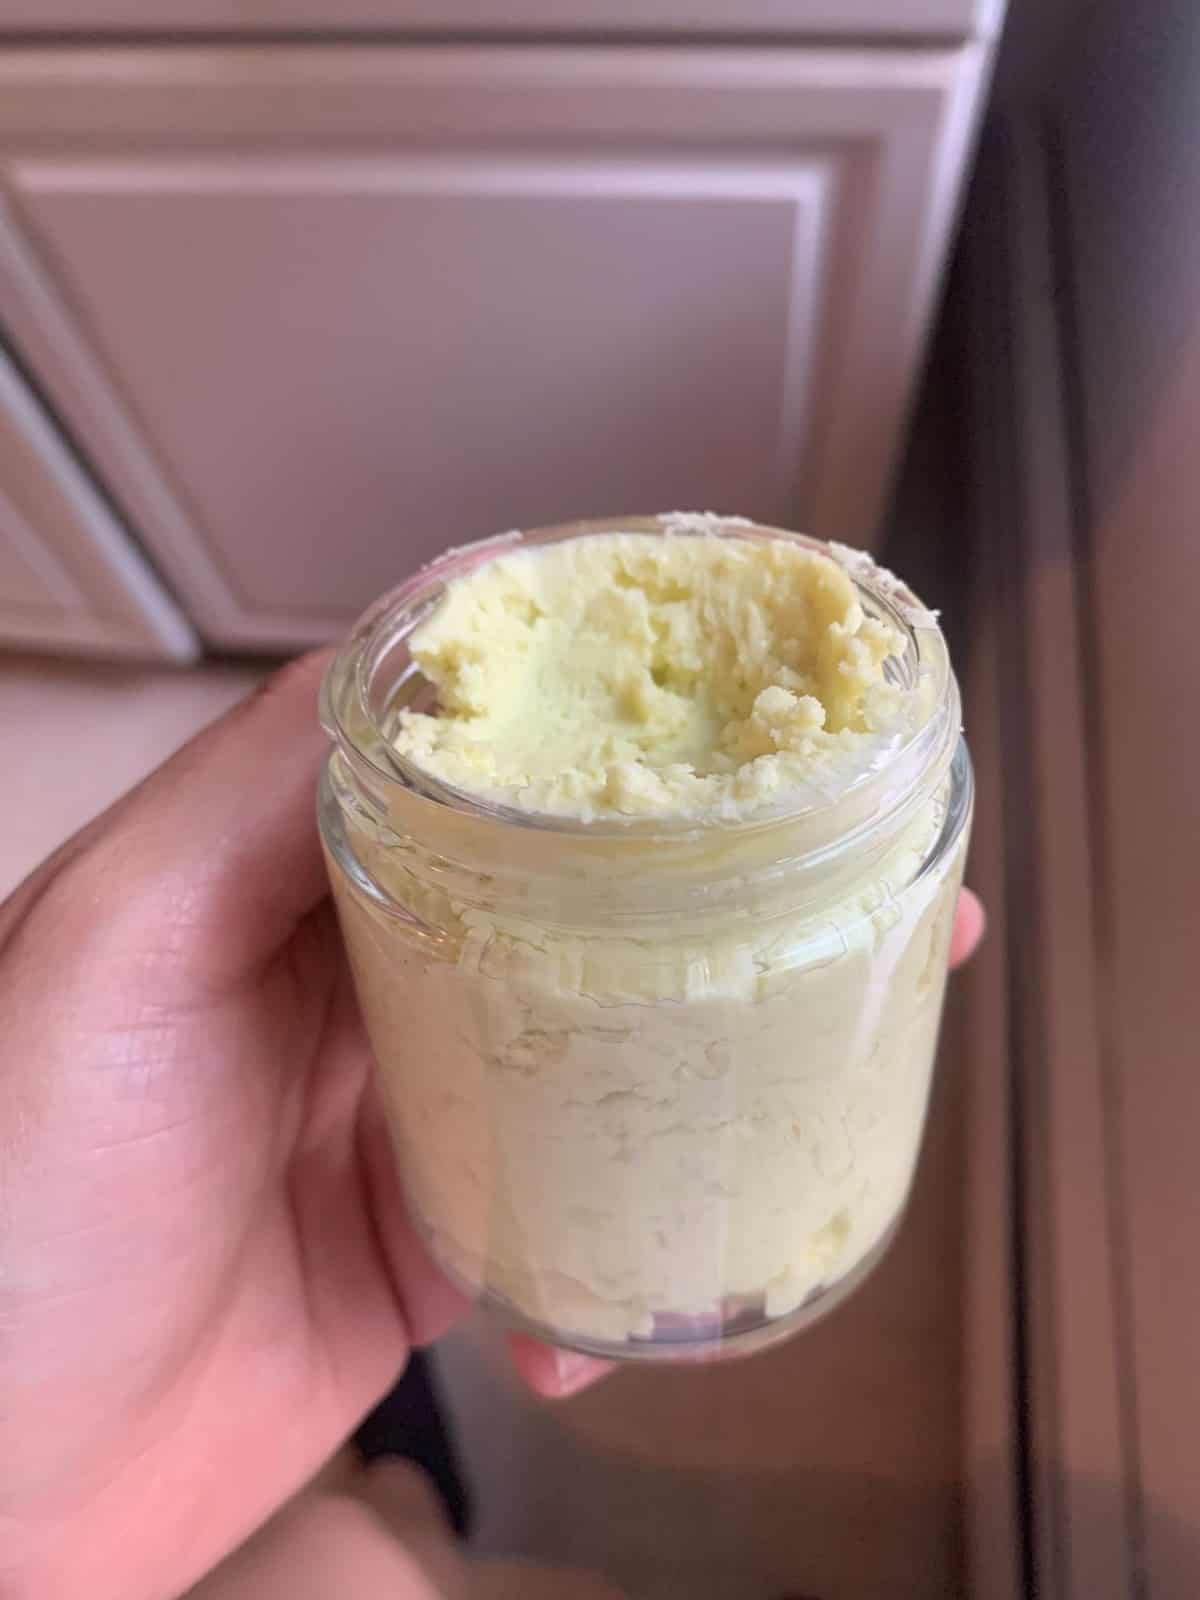
2. Whipped Cacao Body Lotion
This recipe is actually super simple! I was searching for different recipes using cacao butter since I know how nutritious cacao is. It’s rich in fatty acids and polyphenols, which make it perfect for skin hydration and nourishment. Plus, it can improve skin elasticity, which folks with aging skin might like!
I found this recipe on the Navitas Organics website, and it seemed like the perfect recipe to try since it’s simple but still uses lots of fantastic ingredients for the skin. Plus, you can make a delicious dessert with the leftover cacao and coconut oil!
Let’s dive into the recipe! These are the ingredients:

- ¼ cup cacao butter
- ¼ cup virgin coconut oil
- ¼ cup sweet almond oil
- 3-5 drops of lavender essential oil (or your favorite one!)
Directions:
- Set up a double boiler and add the cacao butter to a heatproof container, letting it melt. You can also do this directly on a saucepan but I prefer using a double boiler to avoid overheating the ingredients since they can lose some of their nourishing properties.
- Then add the coconut and sweet almond oil and mix to incorporate. Remove from the heat and let it cool. Put it in the fridge for about an hour so it solidifies a little bit.
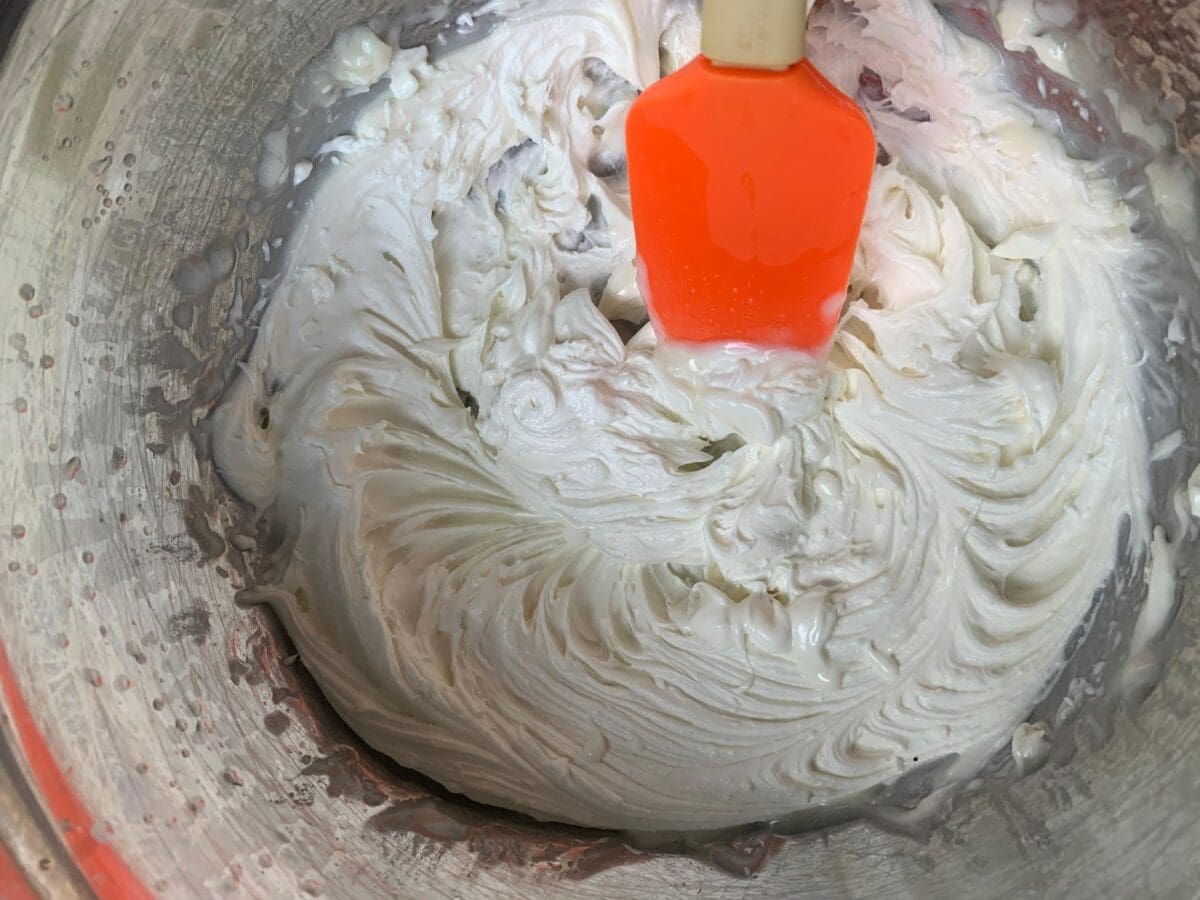
- Once the color of the mixture turns whitish, take it out of the fridge, add the essential oil and whip it using a hand mixer. You can also do it with a whisk but I’ll take a bit longer. This will give the lotion a frosting type of texture.
- Put the lotion in containers and keep it in a cool place to preserve the texture.
My thoughts on this recipe:
I love how easy, accessible, and simple this recipe is. It’s definitely going to turn into a go-to for me. And I think it’s the perfect recipe to start playing with emulsions!
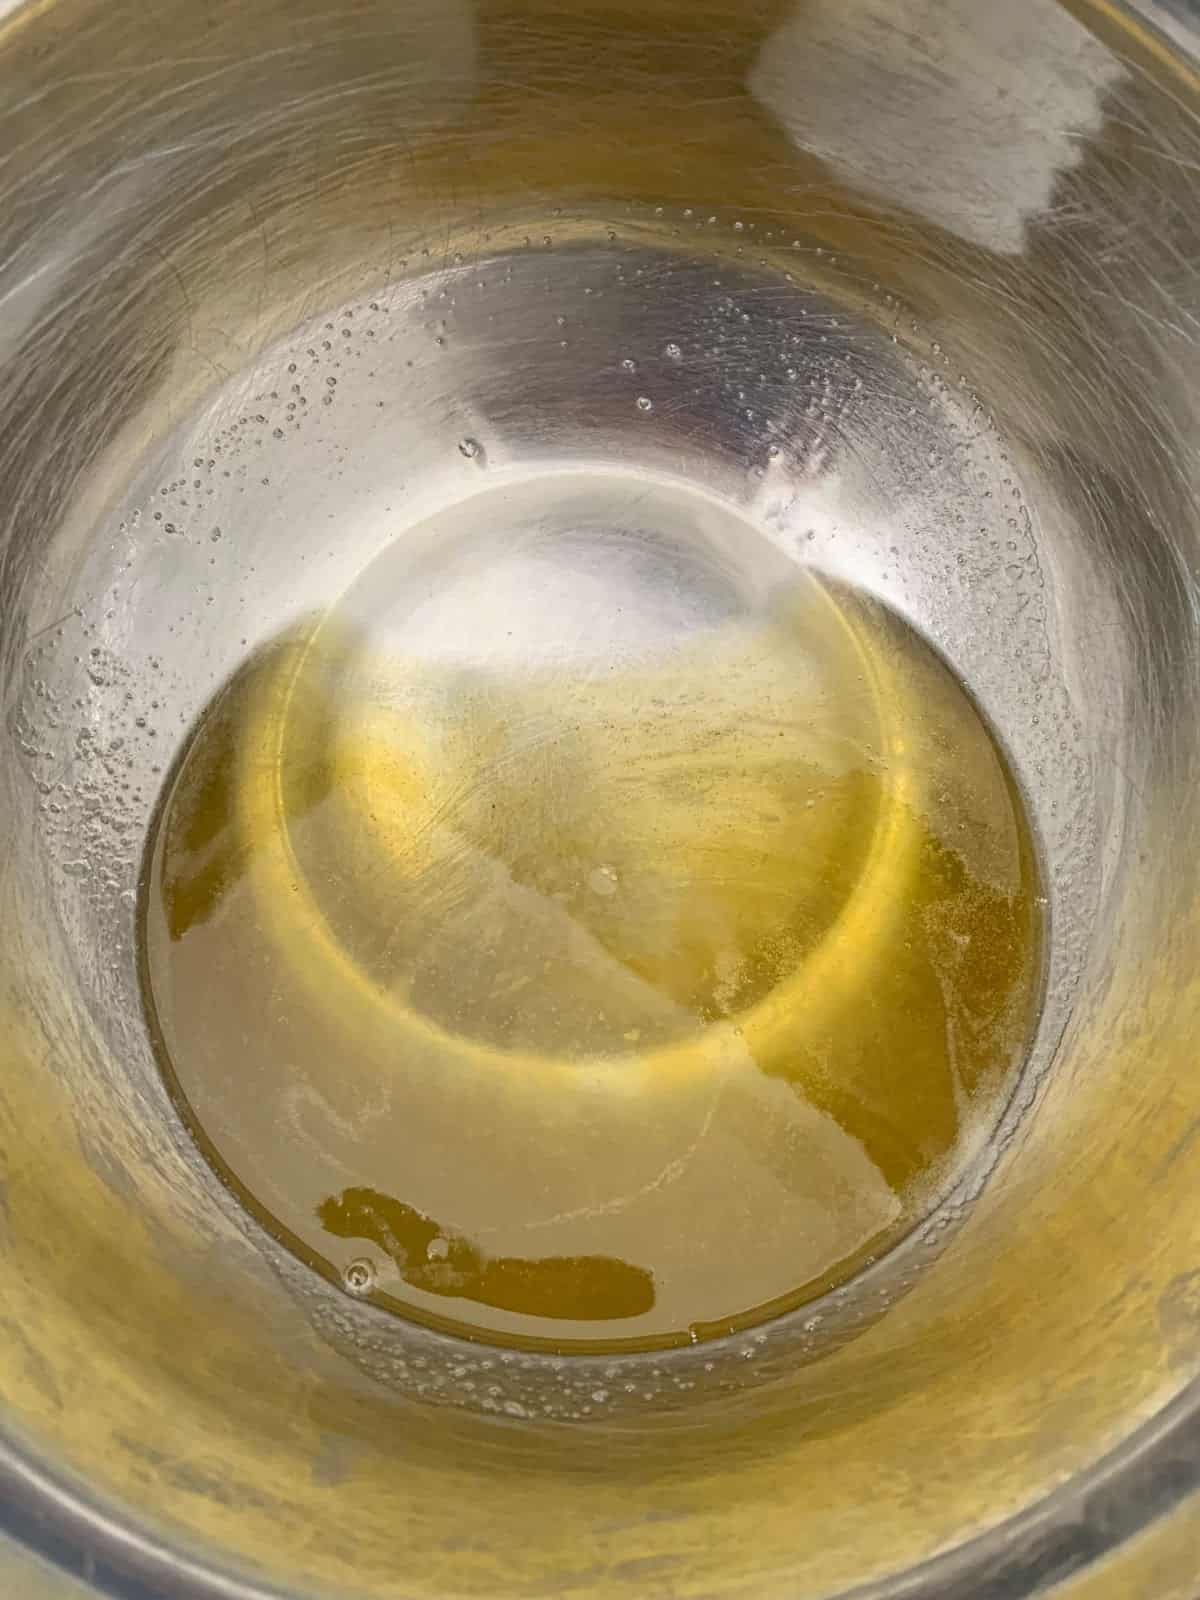
After making it, I put it on immediately and it felt very oily. It melted into oil as soon as I put it in my hand and it felt like the whipped texture wasn’t holding up. However, it was pretty hot in my kitchen when I made it. Once I put it in the fridge to cool, and took it out after several hours, the texture was creamy and felt more like a lotion rather than just oil.
This recipe feels like the perfect summer lotion. It’s super lightweight and it absorbs quickly into the skin. It also feels very hydrating and my skin glows after putting it on. I see this lotion as a perfect complement to sunscreen or the perfect after-sun skin nourishment.
As I mentioned regarding the texture: the ‘whipped’ texture will not hold if it’s hot where you live. This is actually a common issue for many whipped lotions—it needs a stable temperature to hold. I made it on a pretty hot day with no AC, which was probably not the best idea. However, you can keep it creamy just by keeping it in the fridge!
Overall, I think this is a great summer lotion with lots of skin benefits! It’s super simple to make (and you can also skip the whipping part if you want to!). You’ll be left with a liquid oily lotion you can put in any dispenser.
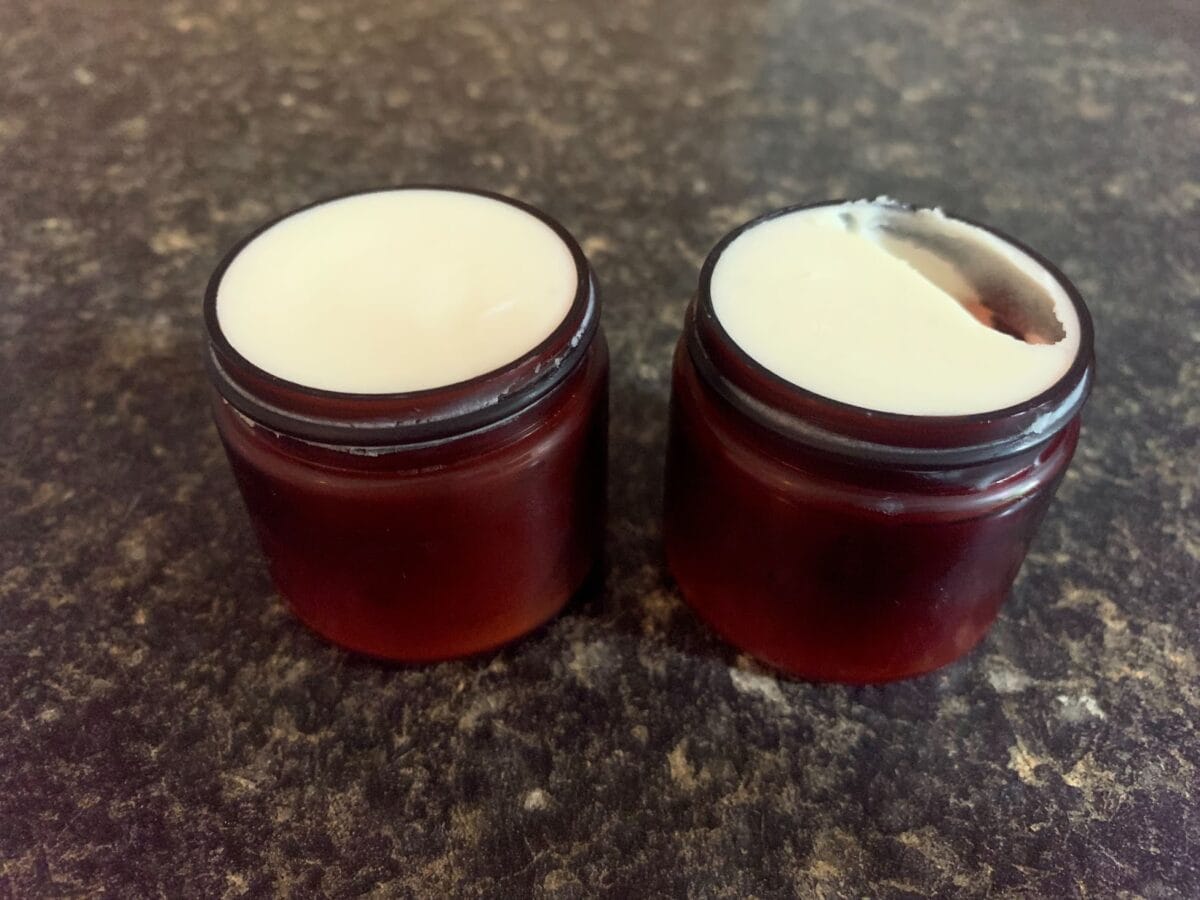
3. Calendula Body Lotion

The Calendula Body Lotion requires a bit more commitment, but it’s still pretty simple! The tricky part is the herb-infused oil, mostly because it takes about an hour to make. But it’s easy and quick once you have that.
This recipe came from The Herbal Academy (where I study herbalism!). I love bringing herbs and plants into my DIY ventures. I really wanted to try a recipe with infused herbs, and like magic, they emailed me this recipe the exact day I was coming up with ideas for this article.
I’m so excited about this recipe because I love calendula—it has so many important skin benefits (and I get excited about plants). It has anti-inflammatory, antiviral, anti-fungal, anti-microbial properties, and you can use the flower to treat minor cuts, rashes, and burns. It’s super gentle on the skin and a perfect ally to moisturize and deeply nourish your skin.
So, if your skin is in need of serious nourishment—this is it! Now, let’s dive into the recipe.
You’ll need about an hour and a half to make this.
Ingredients and tools:

- 30 g (1 oz) of beeswax
- 6 tablespoons of calendula-infused oil
- 4 tablespoons of calendula tea
- 3-5 drops of rosemary essential oil
- Bowl
- Whisk
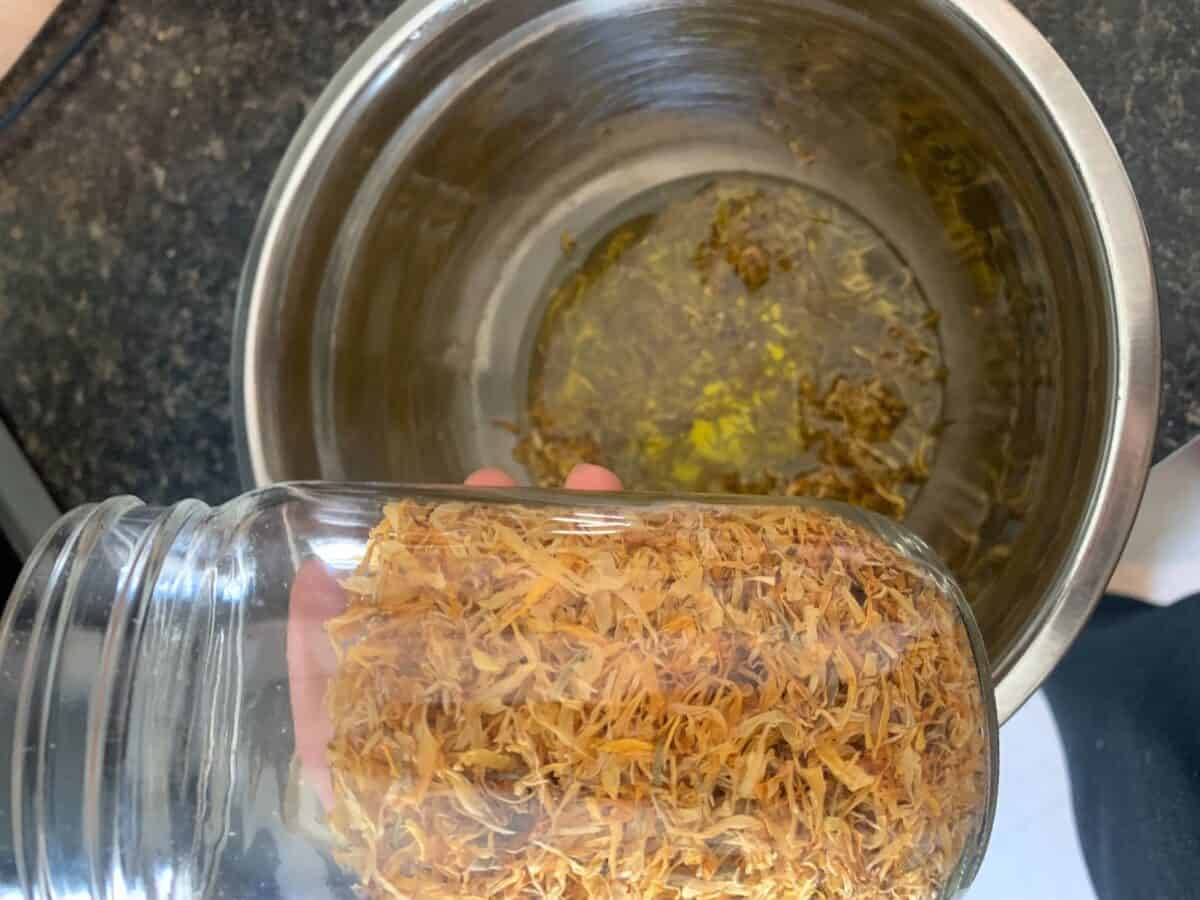
For the calendula-infused oil:
- Carrier oil (I used olive oil for this one but you can use coconut, sweet almond, or jojoba)
- Dried calendula (you can buy it here)
- Cheesecloth
Directions:
- The first step is to infuse your oil with calendula. Take your herbs and add about a quarter of a cup to a measuring cup, and then cover the herbs in oil by an inch. Make sure there’s enough oil to cover all the herbs and mix thoroughly to remove any air pockets.
- Now, set up a double boiler and add your oil + herb infusion to a heat-proof container. Keep an eye on the pot with water to make sure it doesn’t run out. Let the oil infuse for 40-60 minutes in the double boiler, mixing it regularly.
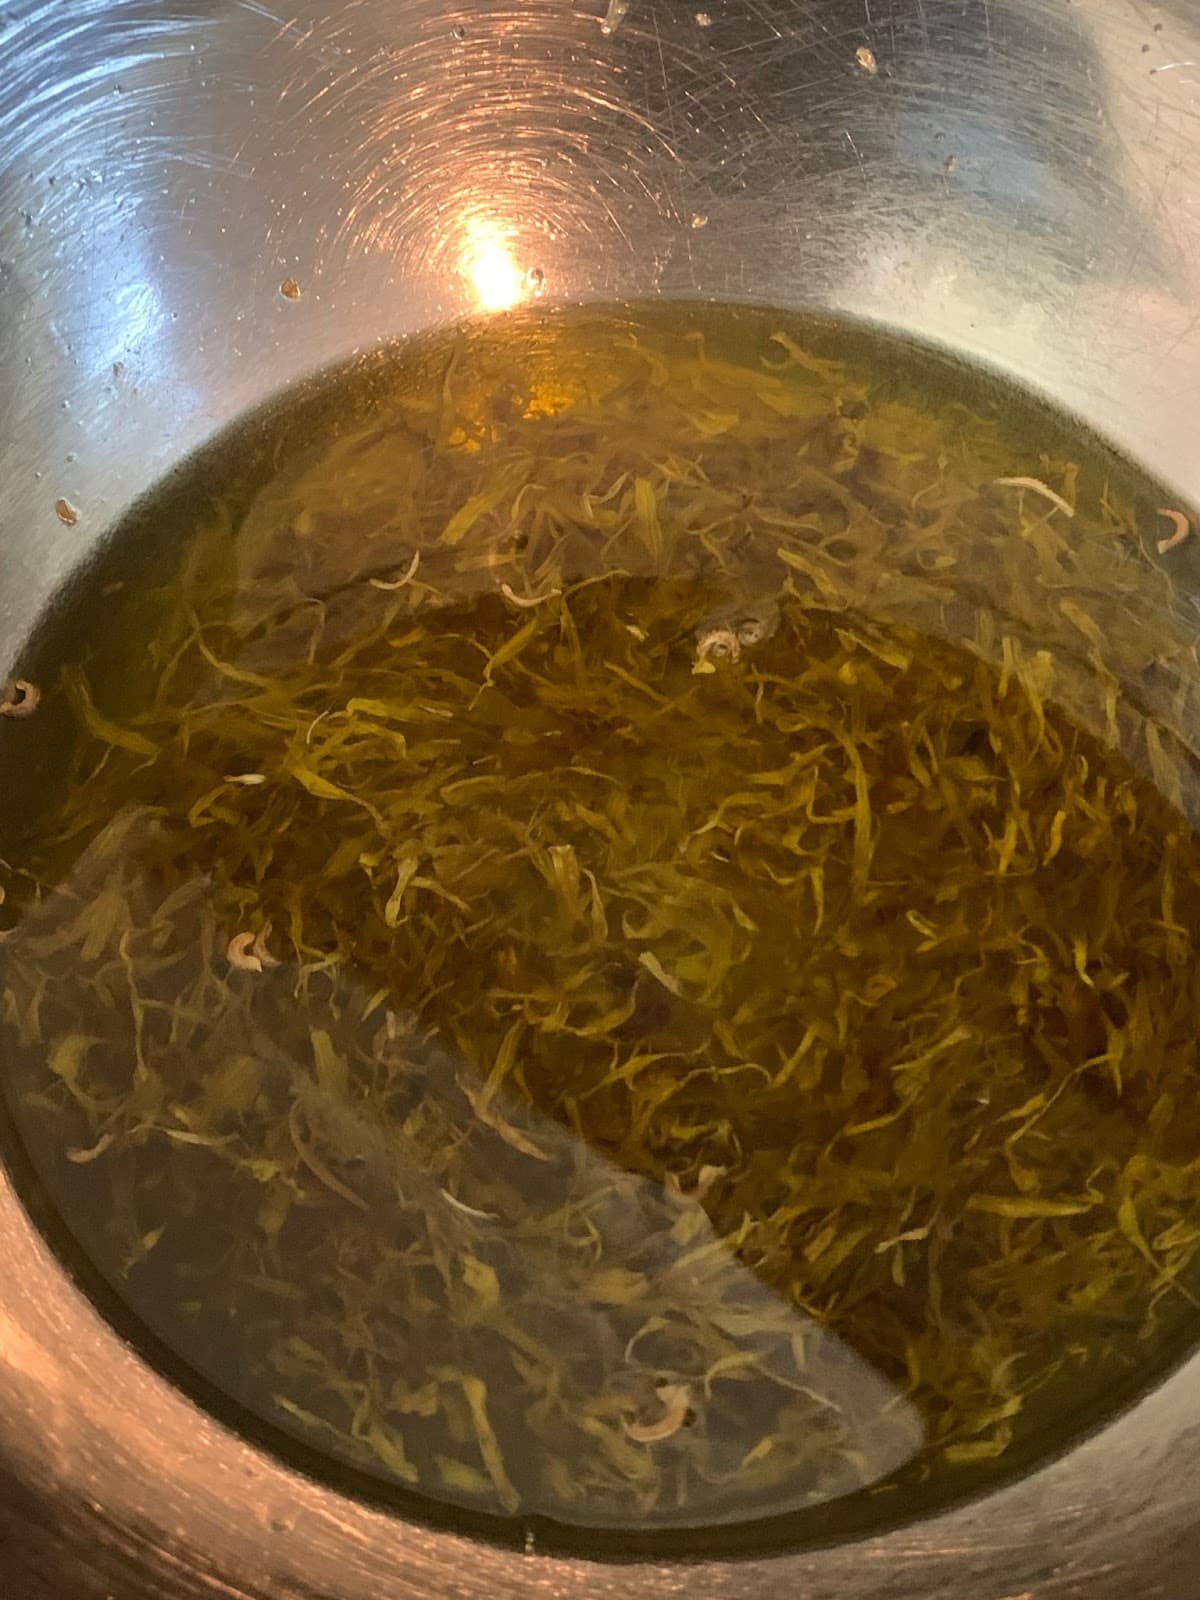
- Remove it from heat after 40-60 minutes and let it cool. Strain the herbs using a cheesecloth, making sure to squeeze every bit of oil out of the herbs. This is your infused oil!
- Now make your calendula tea, add a tablespoon of herbs into a mug, and add hot water. Let it seep for 10 minutes and set aside.
- Set up the double boiler again and add the beeswax to the bowl, letting it melt. Once melted, add the calendula oil and mix until it is incorporated. Remove from heat and grab your whisk. You are going to add the calendula tea little by little, mixing vigorously to create a thicker texture (watch that emulsion happen!).
- Finally, add the rosemary essential oil, mix to incorporate, and put the lotion in a container. It’ll last about 6 months and you can add a natural preservative to extend its shelf life.
My thoughts on this body lotion recipe:
The process of making this lotion takes some time commitment, but if you’re looking for deep skin nourishment, this is it! The lotion is a bit thicker than I expected it to be, which is not my favorite lotion texture, but I love the way my skin feels after putting it on.
Even though it’s thick, I feel like my skin absorbs it quite quickly. I’ve been putting it on right after showering so my pores are more open and can better absorb all the goodness of this lotion. I do think this is a formula that’s better suited for wintertime when the skin gets drier.
A little plus is that I had some leftover calendula oil, which I’ve been using to dry brush myself before showering and it’s amazing.
You can also make this lotion the easy way by using non-infused oil and hot water instead of tea. But, you’ll be missing out on some of the wonderful skin benefits of calendula!
Common Toxic Ingredients In Store-Bought Body Lotion
So, why make your own body lotion? The truth is, conventional brands and products at most supermarkets are made with a cocktail of potentially problematic chemicals. Some of these ingredients are known to cause allergies, can be carcinogenic, disrupt hormones, harm your reproductive system, and more.
These are a few of the potentially toxic ingredients you want to look out for in body lotion:
Artificial fragrances
I put this one first because, as someone with lots of allergies, I know fragrance is a big “no-no.” One of the main issues with fragrance is that behind that single word can hide thousands of different ingredients.
This lack of transparency means that, ultimately, we don’t know exactly what we’re putting on our bodies. Hiding behind “fragrance” are chemicals like phthalates which are known to be endocrine disruptors and cause allergies.
Formaldehyde and formaldehyde-releasers
This one is also complex because formaldehyde can “hide” behind other names. This is because even if formaldehyde itself is not added to a product, a formaldehyde-releaser might be.
Certain ingredients release formaldehyde as they break down, meaning we have to be on the lookout for formaldehyde-releasing preservatives such as quaternium-15, DMDM hydantoin, imidazolidinyl urea, diazolidinyl urea, methylene glycol, and paraformaldehyde.
There are many health concerns associated with formaldehyde, including allergies, irritation, and even cancer.
Parabens
These endocrine disruptors are commonly found in lotion and other personal care products. They can be found under names like:
- methylparaben
- butylparaben
- propylparaben
- ethylparaben
Their primary use is as a preservative to maintain shelf life.
Isothiazolinone preservatives
Methylisothiazolinone (MIT) and other isothiazolinone preservatives are also commonly used in many personal care products, including lotion. I’ve even seen it in baby “safe” products and cosmetics claiming to be clean and natural.
The main concerns with this one are allergies, immunotoxicity, and skin irritation. And as with almost every other chemical, it’s sometimes labeled with different names such as:
- 2-Methyl-2H-isothiazol-3-one
- Methylchloroisothiazolinone
- 4-isothiazolin-3-one
- 5-chloro-2-methyl-
- and others
PFAS or “forever chemicals”
While it’s becoming less common these days, cosmetics and personal care products can also contain intentionally-added PFAS. In lotions, this is more relevant to anti-aging creams. You’ll find them on the label as “polyfluoroalkyl” or other names containing “fluoro”.
PFAS is actually Teflon used to make non-stick pans, but it has now filtered into pretty much everywhere—including drinking water. These chemicals have been linked to cancer, reproductive issues, and they can harm the immune system.
When you make your own body lotion, you have way more control over what’s in it, so you can avoid these ingredients and others!
When getting started with DIY skincare, body lotion is a perfect place to start. It’s not as sensitive as the skin on your face, and you can begin with very simple recipes and go from there.
Plus, lotion is an important swap to make in non-toxic living. We tend to rub lotion all over our bodies, and if you’re using lotions with toxic ingredients, what’s getting absorbed into your body can be a lot.
If you found this helpful and would like to get more non-toxic tips, news, and more delivered to your inbox once a week, sign up for Filtered Fridays.
The Filtery has been an independently owned & run small business from the very beginning—and we’d like to keep it that way! If you want to back accessible, human-created, and well-researched content on reducing toxins in your home, consider supporting us!